


https安全证书基本概述
为什么需要使用HTTPS,因为HTTP不安全,当我们使用http网站时,会遭到劫持和篡改,如果采用https协议,那么数据在传输过程中是加密的,所以黑客无法窃取或者篡改数据报文信息,同时也避免网站传输时信息泄露。
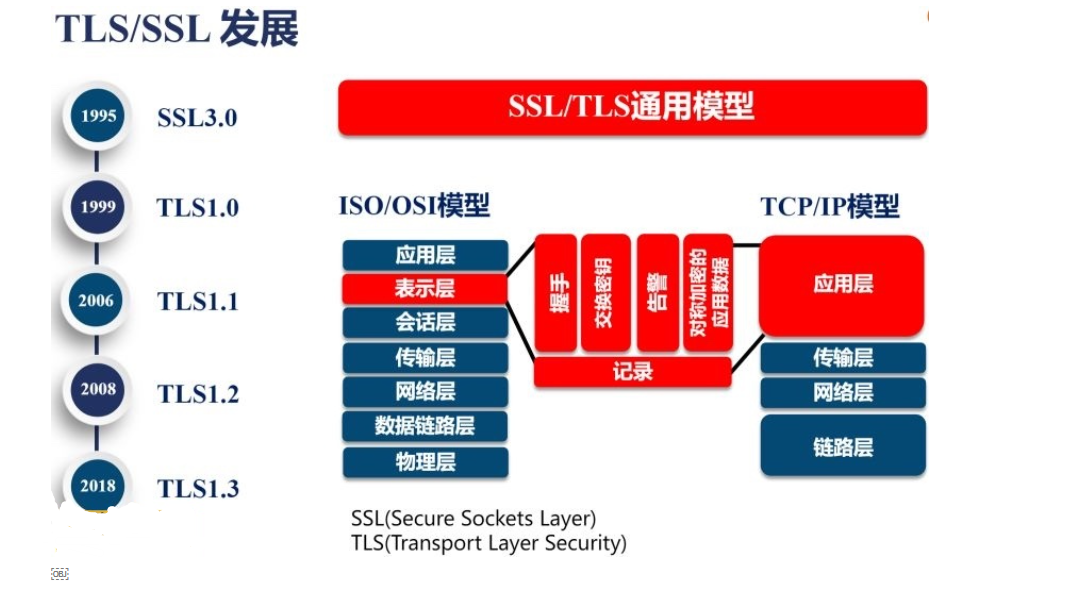
那么我们在实现https时,需要了解ssl协议,但我们现在使用的更多的是TLS加密协议。那么TLS是怎么保证明文消息被加密的呢?
在OSI七层模型中,应用层是http协议,那么在应用层协议之下,我们的表示层,是ssl协议所发挥作用的一层,他通过(握手、交换秘钥、告警、加密)等方式,是应用层http协议没有感知的情况下做到了数据的安全加密
那么在数据进行加密与解密过程中,如何确定双方的身份,此时就需要有一个权威机构来验证双方身份,那么这个权威机构就是CA机构,那么CA机构又是如何颁发证书
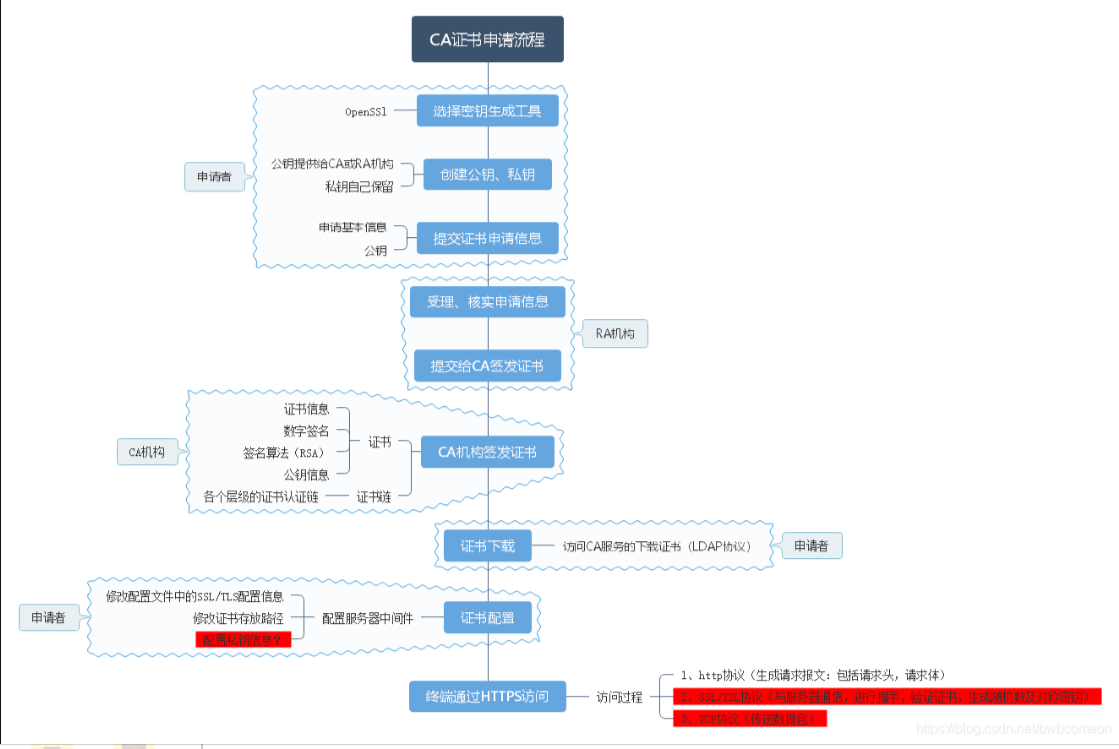
我们首先需要申请证书,先去登记机构进行身份登记,我是谁,我是干嘛的,我想做什么,然后登记机构再通过CSR发给CA,CA中心通过后会生成一堆公钥和私钥,公钥会在CA证书链中保存,公钥和私钥证书我们拿到后,会将其部署在WEB服务器上
1.当浏览器访问我们的https站点时,他回去请求我们的证书
2.Nginx这样的web服务器会将我们的公钥证书发给浏览器
3.浏览器会去验证我们的证书是否合法有效
4.CA机构会将过期的证书放置在CRL服务器,CRL服务的验证效率是非常差的,所以CA有推出了OCSP响应程序,OCSP响应程序可以查询指定的一个证书是否过去,所以浏览器可以直接查询OSCP响应程序,但OSCP响应程序性能还不是很高
5.Nginx会有一个OCSP的开关,当我们开启后,Nginx会主动上OCSP上查询,这样大量的客户端直接从Nginx获取证书是否有效
流程:
1、浏览器发起往服务器的443端口发起请求,请求携带了浏览器支持的加密算法和哈希算法。
2、服务器收到请求,选择浏览器支持的加密算法和哈希算法。
3、服务器下将数字证书返回给浏览器,这里的数字证书可以是向某个可靠机构申请的,也可以是自制的。
4、浏览器进入数字证书认证环节,这一部分是浏览器内置的TLS完成的:
4.1 首先浏览器会从内置的证书列表中索引,找到服务器下发证书对应的机构,如果没有找到,此时就会提示用户该证书是不是由权威机构颁发,是不可信任的。如果查到了对应的机构,则取出该机构颁发的公钥。
4.2 用机构的证书公钥解密得到证书的内容和证书签名,内容包括网站的网址、网站的公钥、证书的有效期等。浏览器会先验证证书签名的合法性(验证过程类似上面Bob和Susan的通信)。签名通过后,浏览器验证证书记录的网址是否和当前网址是一致的,不一致会提示用户。如果网址一致会检查证书有效期,证书过期了也会提示用户。这些都通过认证时,浏览器就可以安全使用证书中的网站公钥了。
4.3 浏览器生成一个随机数R,并使用网站公钥对R进行加密。
5、浏览器将加密的R传送给服务器。
6、服务器用自己的私钥解密得到R。
7、服务器以R为密钥使用了对称加密算法加密网页内容并传输给浏览器。
8、浏览器以R为密钥使用之前约定好的解密算法获取网页内容。
htpps实践
#web01nginx配置文件
[root@web01 conf.d]# vim test.conf
    server {
            listen 80;
            server_name jiujiu.com;
            root /code;
            index index.html;
            charset utf-8;
    }
#创建站点目录
mkdir /code
#配置nginx页面文件
[root@web01 code]# vim index.html
<!DOCTYPE html>
<html lang="en">
<head>
    <meta charset="UTF-8">
    <title>我是title</title>
</head>
<body>
<article>
  <header>
    <h1>我是Article</h1>
    <p>创建时间:<time pubdate="pubdate">2018/8/10</time></p>
  </header>
  <p>
    <b>Aticle</b>第一次用h5写文章,...
  </p>
  <footer>
    <p><small>酒酒版权所有!</small></p>
  </footer>
</article>
</body>
</html>
#重启服务
systemctl restart nginx
#本地域名解析
10.0.0.7  jiujiu.com
#浏览器
jiujiu.com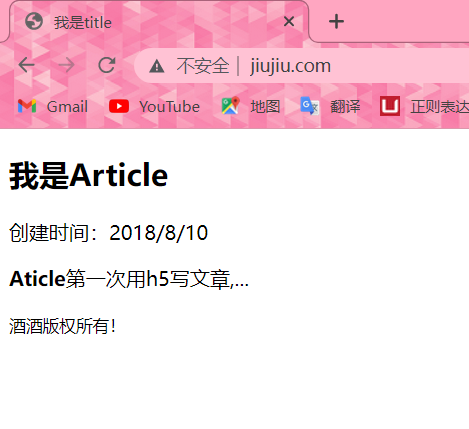
劫持模拟
#web02配置文件
upstream jiechi {
        server 10.0.0.7:80;
}

server {
        listen 80;
        server_name jc.xxx.com;

        location / {
                proxy_pass http://jiechi;
                proxy_set_header Host $http_host;
                sub_filter '<title>我是title' '<title>title';
                sub_filter '<small>酒酒版权所有!' ' <small>才不是酒酒版权所有';
        }
}

# 重启nginx
systemctl restart nginx
#本地域名解析
10.0.0.8 jc.xxx.com
#浏览器访问
jc.xxx.com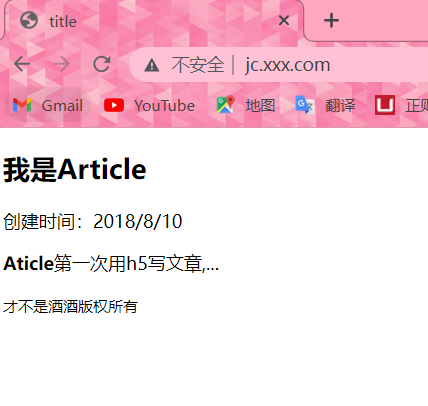
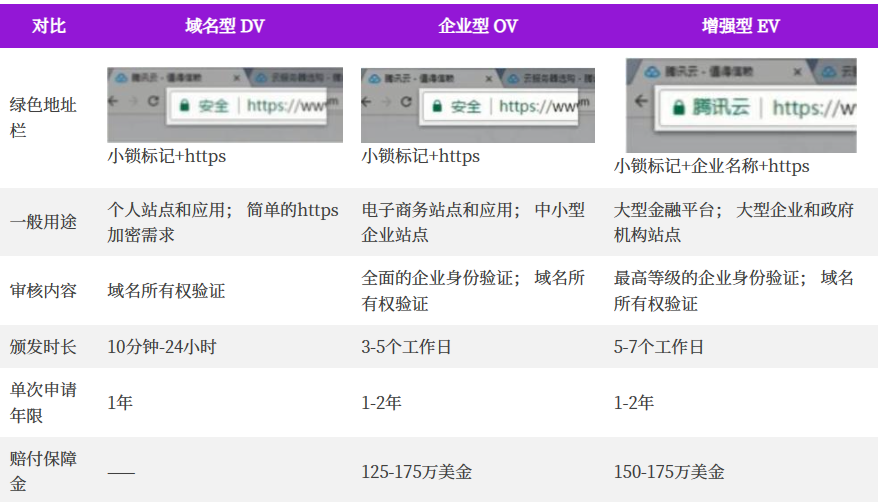
证书类型介绍
HTTPS注意事项
https不支持续费,证书到期需要重新申请并进行替换
https不支持三级域名解析,如 test.m.driverzeng.com
https显示绿色,说明整个网站的url都是https的
https显示黄色,因为网站代码中包含http的不安全链接
https显示红色,那么证书是假的或者证书过期。
Nginx单台实现HTTPS
环境准备
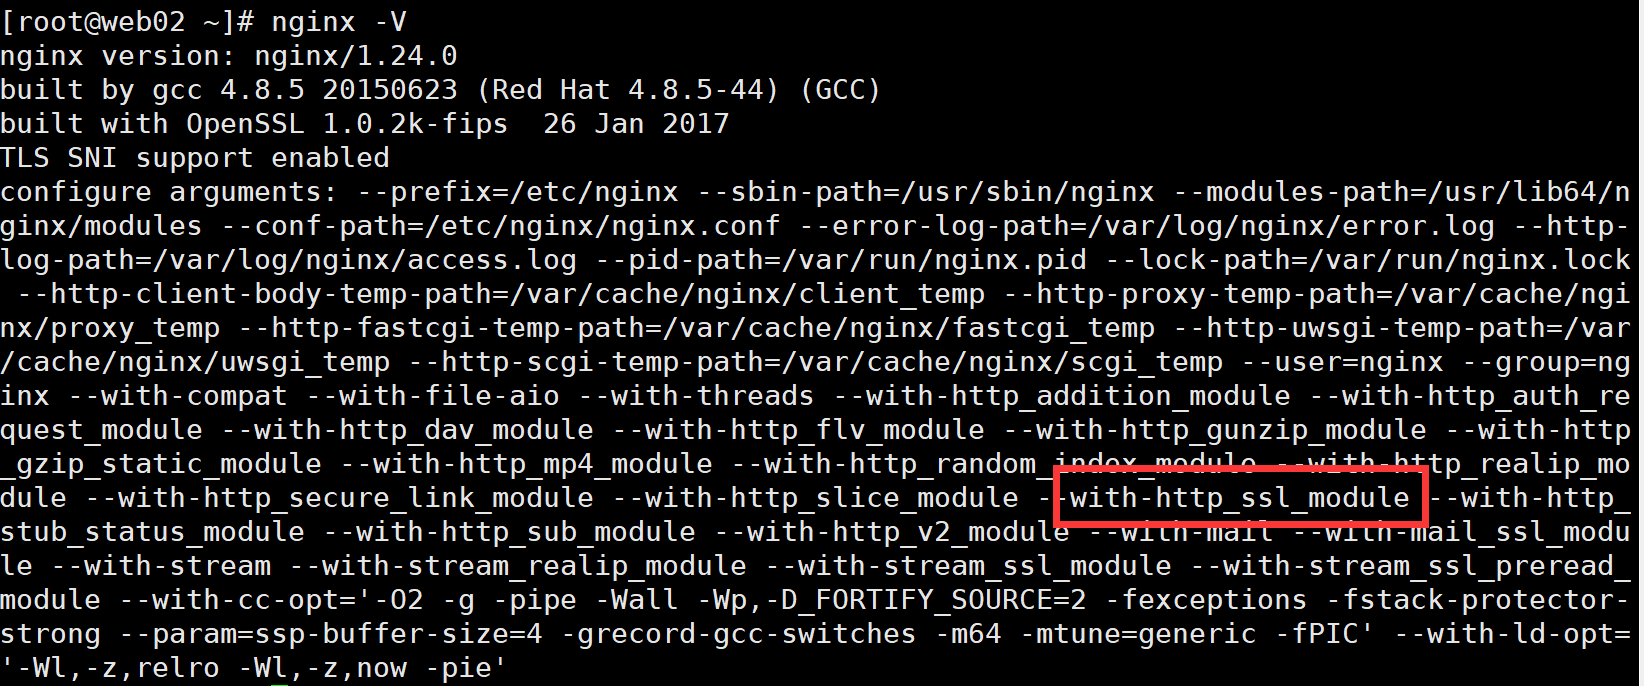
#nginx必须有ssl模块
[root@web02 ~]# nginx -V
---
--with-http_ssl_module
---
申请证书
#创建存放ssl证书的路径
[root@web02 ~]# mkdir -p /etc/nginx/ssl_key
[root@web02 ~]# cd /etc/nginx/ssl_key
#使用openssl命令充当CA权威机构创建证书(生产不使用此方式生成证书,不被互联网认可的黑户证书)
[root@web02 ssl_key]# openssl genrsa -idea -out server.key 2048
Generating RSA private key, 2048 bit long modulus
...............................................+++............................................+++
e is 65537 (0x10001)
#密码1234
Enter pass phrase for server.key:                      //设置密码
Verifying - Enter pass phrase for server.key:         //确认密码
[root@web03 ssl_key]# ls
server.key
#生成自签证书,同时去掉私钥的密码
[root@web02 ssl_key]# openssl req -days 36500 -x509 -sha256 -nodes -newkey rsa:2048 -keyout server.key -out server.crt
Generating a 2048 bit RSA private key
.............+++
................................................+++
writing new private key to 'server.key'
-----
You are about to be asked to enter information that will be incorporated
into your certificate request.
What you are about to enter is what is called a Distinguished Name or a DN.
There are quite a few fields but you can leave some blank
For some fields there will be a default value,
If you enter '.', the field will be left blank.
-----
Country Name (2 letter code) [XX]:CN                //所在国家
State or Province Name (full name) []:shanghai      //所在省
Locality Name (eg, city) [Default City]:shanghai    //所在城市
Organization Name (eg, company) [Default Company Ltd]:aliyun    //公司名字
Organizational Unit Name (eg, section) []:aliyun    //部门组织名字
Common Name (eg, your name or your server's hostname) []:aliyun    //域名
Email Address []:123@qq.com    //邮箱
#上诉填写任意信息即可
#命令解释
        # req  --> 用于创建新的证书
        # new  --> 表示创建的是新证书
        # x509 --> 表示定义证书的格式为标准格式
        # key  --> 表示调用的私钥文件信息
        # out  --> 表示输出证书文件信息
        # days --> 表示证书的有效期
配置证书
#启动ssl功能
Syntax:  ssl on | off;
Default: ssl off;
Context: http,server

#证书文件
Syntax:  ssl_certificate file;
Default: -
Context: http,server

#私钥文件
Syntax:  ssl_certificate_key fil;
Default: -
Context: http,server
修改nginx配置文件
[root@web02 conf.d]# vim ssl.conf
server {
        listen 443 ssl;
        server_name jj.xxx.com;
        ssl_certificate   /etc/nginx/ssl_key/server.crt;
        ssl_certificate_key  /etc/nginx/ssl_key/server.key;
        location / {
                root /code;
                index index.html;
        }
}
#准备对应的站点目录,并重启Nginx
[root@web02 conf.d]# echo "web02_https" > /code/index.html
[root@web02 conf.d]# nginx -s reload
#本地域名解析
10.0.0.8 jj.xxx.com
#浏览器访问  //由原来的http转为https
https://jj.xxx.com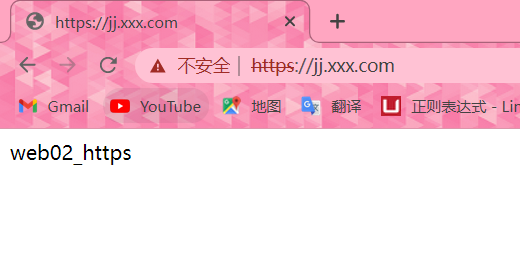
使用rewrite协议跳转
# 80端口强转443 提升用户体验
server {
        listen 443 ssl;
        server_name jj.xxx.com;
        ssl_certificate   /etc/nginx/ssl_key/server.crt;
        ssl_certificate_key  /etc/nginx/ssl_key/server.key;
        location / {
                root /code;
                index index.html;
        }
}
#配置将用户访问http请求强制跳转https
server {
        listen 80;
        server_name jiujiu.com;
        rewrite (.*) https://jiujiu.com$1 redirect;
}
#准备对应的站点目录,并重启Nginx
[root@web02 conf.d]# echo "zls_https" > /code/index.html
[root@web02 conf.d]# nginx -s reload
# 重启nginx
systemctl restart nginx
#域名解析
10.0.0.8 jiujiu.com
# 访问浏览器
jiujiu.com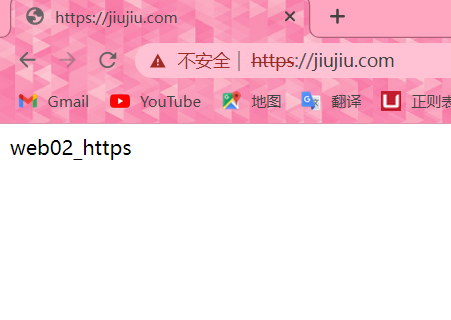
实践:给wordpress配置证书/并设置为伪静态
数据库部署:
# 关闭防火墙
systemctl stop firewalld
# 安装数据库
[root@db01 ~]# yum install -y mariadb-server
#启动服务加入开机自启
[root@db01 ~]# systemctl start mariadb
[root@db01 ~]# systemctl enable mariadb
# 创建数据库
[root@db01 ~]# mysql
Welcome to the MariaDB monitor.  Commands end with ; or \g.
Your MariaDB connection id is 2
Server version: 5.5.68-MariaDB MariaDB Server
Copyright (c) 2000, 2018, Oracle, MariaDB Corporation Ab and others.
Type 'help;' or '\h' for help. Type '\c' to clear the current input statement.
MariaDB [(none)]> `create database wp charset utf8;`  #//创建一个叫wp的数据库
Query OK, 1 row affected (0.00 sec)
MariaDB [(none)]> `show databases;`    #//查看数据库是否创建成功
+--------------------+
| Database           |
+--------------------+
| information_schema |
| mysql              |
| performance_schema |
| test               |
| wp                 |
+--------------------+
6 rows in set (0.00 sec)
MariaDB [(none)]>
# 创建数据库用户
MariaDB [(none)]> `grant all on wp.* to wp_user@'%' identified by '123';`
Query OK, 0 rows affected (0.00 sec)
MariaDB [(none)]>
        #创建命令写详解;
    `grant all`: 授予所有权限。
    `on wc.*`: 授予`wc`数据库中所有表的权限(“*”表示所有表)。
    `to wc_user@'%'`: 将授权授予用户名为`wc_user` (用户名可以自定义),从任何主机(`%`)登录。
    `identified by '123'`: 指定对于用户`wc_user`的身份验证密码为`123`。
web01部署woordpress
# 关闭防火墙
[root@web01 ~]# systemctl stop firewalld
# 安装nginx和php
[root@web01 ~]# yum install -y nginx
# 创建www用户
[root@web01 ~]# groupadd -g 666 www && useradd -g 666 -u 666 -s /sbin/nologin -M www
[root@web01 ~]# id www
uid=666(www) gid=666(www) groups=666(www)
#添加php源
[root@web01 ~]# vim /etc/yum.repos.d/php.repo
[php-webtatic]
name = PHP Repository
baseurl = http://us-east.repo.webtatic.com/yum/el7/x86_64/
gpgcheck = 0
#清除缓存/加载缓存
yum clean all
yum makecache
# 下载php安装依赖    //如果下载不成功是因为已经安装过其他版本的php了,卸载即可
yum -y install php71w php71w-cli php71w-common php71w-devel php71w-embedded php71w-gd php71w-mcrypt php71w-mbstring php71w-pdo php71w-xml php71w-fpm php71w-mysqlnd php71w-opcache php71w-pecl-memcached php71w-pecl-redis php71w-pecl-mongodb
# 修改web01 Nginx主配置文件
[root@web01 ~]# vim /etc/nginx/nginx.conf
user  www;                 #//user nginx  修改为user  www
worker_processes  auto;

error_log  /var/log/nginx/error.log notice;
pid        /var/run/nginx.pid;
# 修改php配置文件
[root@web01 ~]# vim /etc/php-fpm.d/www.conf
; Unix user/group of processes
; Note: The user is mandatory. If the group is not set, the default user's group
;       will be used.
; RPM: apache Choosed to be able to access some dir as httpd
user = www    #//改为www用户
; RPM: Keep a group allowed to write in log dir.
group = www  #//改为www用户

; The address on which to accept FastCGI requests.
; Valid syntaxes are:
;   'ip.add.re.ss:port'    - to listen on a TCP socket to a specific IPv4 address on
;                            a specific port;
;   '[ip:6:addr:ess]:port' - to listen on a TCP socket to a specific IPv6 address on
;                            a specific port;
;   'port'                 - to listen on a TCP socket to all addresses
;                            (IPv6 and IPv4-mapped) on a specific port;
;   '/path/to/unix/socket' - to listen on a unix socket.
# 编写Nginx网站配置文件
[root@web01 ~]# vim /etc/nginx/conf.d/blog.conf
server{
    listen 80;
    server_name blog.xxx.com;
    root /code/wordpress;

    location / {
        index index.php index.html;
    }
    location ~ \.php$ {
        fastcgi_pass 127.0.0.1:9000;
         fastcgi_param SCRIPT_FILENAME $document_root$fastcgi_script_name;
        include /etc/nginx/fastcgi_params;
    }
}
#根据配置文件创建站点目录和路径
[root@web01 ~]# mkdir /code
# 下载wordpress
wget http://test.driverzeng.com/Nginx_Code/wordpress-5.0.3-zh_CN.tar.gz
#解压到/code站点目录里
[root@web01 ~]# tar xf wordpress-5.0.3-zh_CN.tar.gz -C /code/
# 授权www给/code
[root@web01 ~]# chown -R www.www /code/
# 重启服务
systemctl restart nginx php-fpm
# 本地域名解析
10.0.0.7 blog.xxx.com
生成证书并部署
#生成证书
#创建存放ssl证书的路径
[root@web01 ~]# mkdir -p /etc/nginx/blog_key
[root@web01 ~]# cd /etc/nginx/blog_key
#使用openssl命令充当CA权威机构创建证书(生产不使用此方式生成证书,不被互联网认可的黑户证书)
[root@web01 blog_key]# openssl genrsa -idea -out blog.key 2048
Generating RSA private key, 2048 bit long modulus
...............................................+++
............................................+++
e is 65537 (0x10001)
#密码1234
Enter pass phrase for server.key:                      //设置密码
Verifying - Enter pass phrase for server.key:         //确认密码
[root@web01 blog_key]# ls
server.key
#生成自签证书,同时去掉私钥的密码
[root@web01 blog_key]# openssl req -days 36500 -x509 -sha256 -nodes -newkey rsa:2048 -keyout blog.key -out server.crt
Generating a 2048 bit RSA private key
.............+++
................................................+++
writing new private key to 'server.key'
-----
You are about to be asked to enter information that will be incorporated
into your certificate request.
What you are about to enter is what is called a Distinguished Name or a DN.
There are quite a few fields but you can leave some blank
For some fields there will be a default value,
If you enter '.', the field will be left blank.
-----
Country Name (2 letter code) [XX]:CN                //所在国家
State or Province Name (full name) []:shanghai      //所在省
Locality Name (eg, city) [Default City]:shanghai    //所在城市
Organization Name (eg, company) [Default Company Ltd]:aliyun    //公司名字
Organizational Unit Name (eg, section) []:aliyun    //公司名字
Common Name (eg, your name or your server's hostname) []:aliyun    //域名
Email Address []:123@qq.com    //邮箱
#上诉填写任意信息即可
#命令解释
        # req  --> 用于创建新的证书
        # new  --> 表示创建的是新证书
        # x509 --> 表示定义证书的格式为标准格式
        # key  --> 表示调用的私钥文件信息
        # out  --> 表示输出证书文件信息
        # days --> 表示证书的有效期
#查看
[root@web01 blog_key]# ll
total 8
-rw-r--r-- 1 root root 1704 May 11 17:07 blog.key
-rw-r--r-- 1 root root 1411 May 11 17:07 server.crt
# 修改配置文件
server{
        listen 80;
        server_name blog.xxx.com;
        rewrite (.*) https://blog.xxx.com$1 redirect;
}
server{
        listen 443 ssl;
        server_name blog.xxx.com;
        root /code/wordpress;
        index index.php index.html;
        ssl_certificate  /etc/nginx/blog_key/server.crt;
        ssl_certificate_key /etc/nginx/blog_key/blog.key;

        location ~ \.php$ {
                fastcgi_pass 127.0.0.1:9000;
                fastcgi_param SCRIPT_FILENAME $document_root$fastcgi_script_name;
                include /etc/nginx/fastcgi_params;
        }
}
#重启服务
systemctl restart nginx
#浏览器访问
blog.xxx.com
如果出现排版错乱
server {
    listen 80;
    server_name _;
    root /hexo;

    location ~ \.php$ {
        fastcgi_pass 127.0.0.1:9000;
        include fastcgi_params;
        fastcgi_param SCRIPT_FILENAME $document_root$fastcgi_script_name;
    }
}

server {
    listen 80;
    server_name _;
    return 301 https://$host$request_uri;
}

server {
    listen 443 ssl;
    server_name jiujiu.tj.cn;
    root /hexo;
    index index.php index.html;
    ssl_certificate  /etc/nginx/ssl_key/jiujiu.tj.cn_bundle.crt;
    ssl_certificate_key /etc/nginx/ssl_key/jiujiu.tj.cn.key;

    location / {
        try_files $uri $uri/ =404;
    }

    location ~ \.php$ {
        fastcgi_pass 127.0.0.1:9000;
        include fastcgi_params;
        fastcgi_param SCRIPT_FILENAME $document_root$fastcgi_script_name;
    }
}
PV UV IP
PV : 页面独立浏览量 (一条日志,一个请求)
UV : 独立设备
IP : 独立IP
