前决条件:
安装Ansible
#安装
[root@m02 ~]# yum install -y ansible
#修改配置文件  //打开此行注释
[root@m02 ~]# vim /etc/ansible/ansible.cfg
host_key_checking = False
#创建密钥
[root@m02 ~]# ssh-keygen -t dsa -P '' -f ~/.ssh/id_dsa >/dev/null 2>&1
#将公钥推送给客户端服务器
[root@m02 ~]# ssh-copy-id -i ~/.ssh/id_dsa.pub 172.16.1.51
[root@m02 ~]# ssh-copy-id -i ~/.ssh/id_dsa.pub 172.16.1.52
## 创建主机清单
[root@m02 ~]# vim inventory
[db_group]
db01 ansible_host=172.16.1.51
db02 ansible_host=172.16.1.52
## 测试 -i 指定主机清单文件
[root@m02 ~]# ansible db_group -m ping -i inventory
db01 | SUCCESS => {
"ansible_facts": {
"discovered_interpreter_python": "/usr/bin/python"
},
"changed": false,
"ping": "pong"
}
db02 | SUCCESS => {
"ansible_facts": {
"discovered_interpreter_python": "/usr/bin/python"
},
"changed": false,
"ping": "pong"
}
#安装rsync
yum install -y rsync
Ansible tower(awx)介绍
什么是Ansible Tower
Ansible Tower是由Redhat提供的一个管理Ansible前端UI,使用它可以免费管理10台以内的主机,所以
它是一个收费项目,该项目仅适用于那些不会运维开发,并且有钱的选手们,当然,如果会开发,懒
得写,也可以 PJ Ansible Tower。Do you understand me?
Ansible本质上是一个进行了封装的Shell。优点在于它是去中心化的工具,可以直接通过ssh管理远程主机,实现无Agent的部署(ssh+python环境已经原生集成在Linux中)。
Ansible的缺点也在于其去中心化的特点,本身不支持高可用和分布式架构,无法实现Server-Proxy-Client的架构。在比较复杂或者多区域的网络区域中,无法实现统一的集中式管理(如多个ansible管理
端的配置同步),也没有前端UI,对ansible的技能要求比较高。
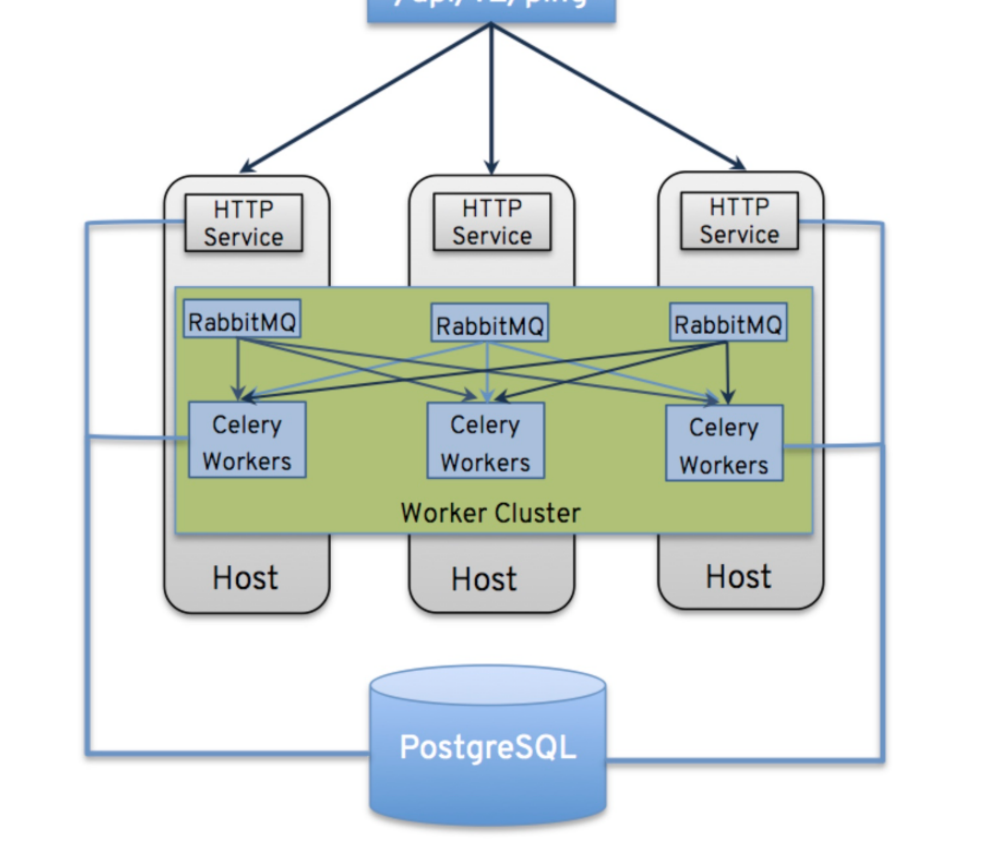
Ansible Tower架构
消息队列:
MQ:message queue
RabbitMQ
RocketMQ
Zero-MQ(ZMQ)
Redis
Kafka
部署
环境准备:
| 主机 | 角色 | 软件 |
|---|---|---|
| m02 | Anible管理端(Dashboard) | Ansible、AWX、nginx、RabbitMQ、PostgreSQL |
| db01 | Ansible被管理端 | 无 |
| db01 | Ansible被管理端 | 无 |
安装: //内存建议2C4H
# 1.解压
[root@m02 ~]# tar xf ansible-tower-setup-bundle-3.6.2-1.el7.tar.gz
# 2.修改主机清单
[root@m02 ~]# cd ansible-tower-setup-bundle-3.6.2-1/
    [root@m02 ansible-tower-setup-bundle-3.6.2-1]# vim inventory
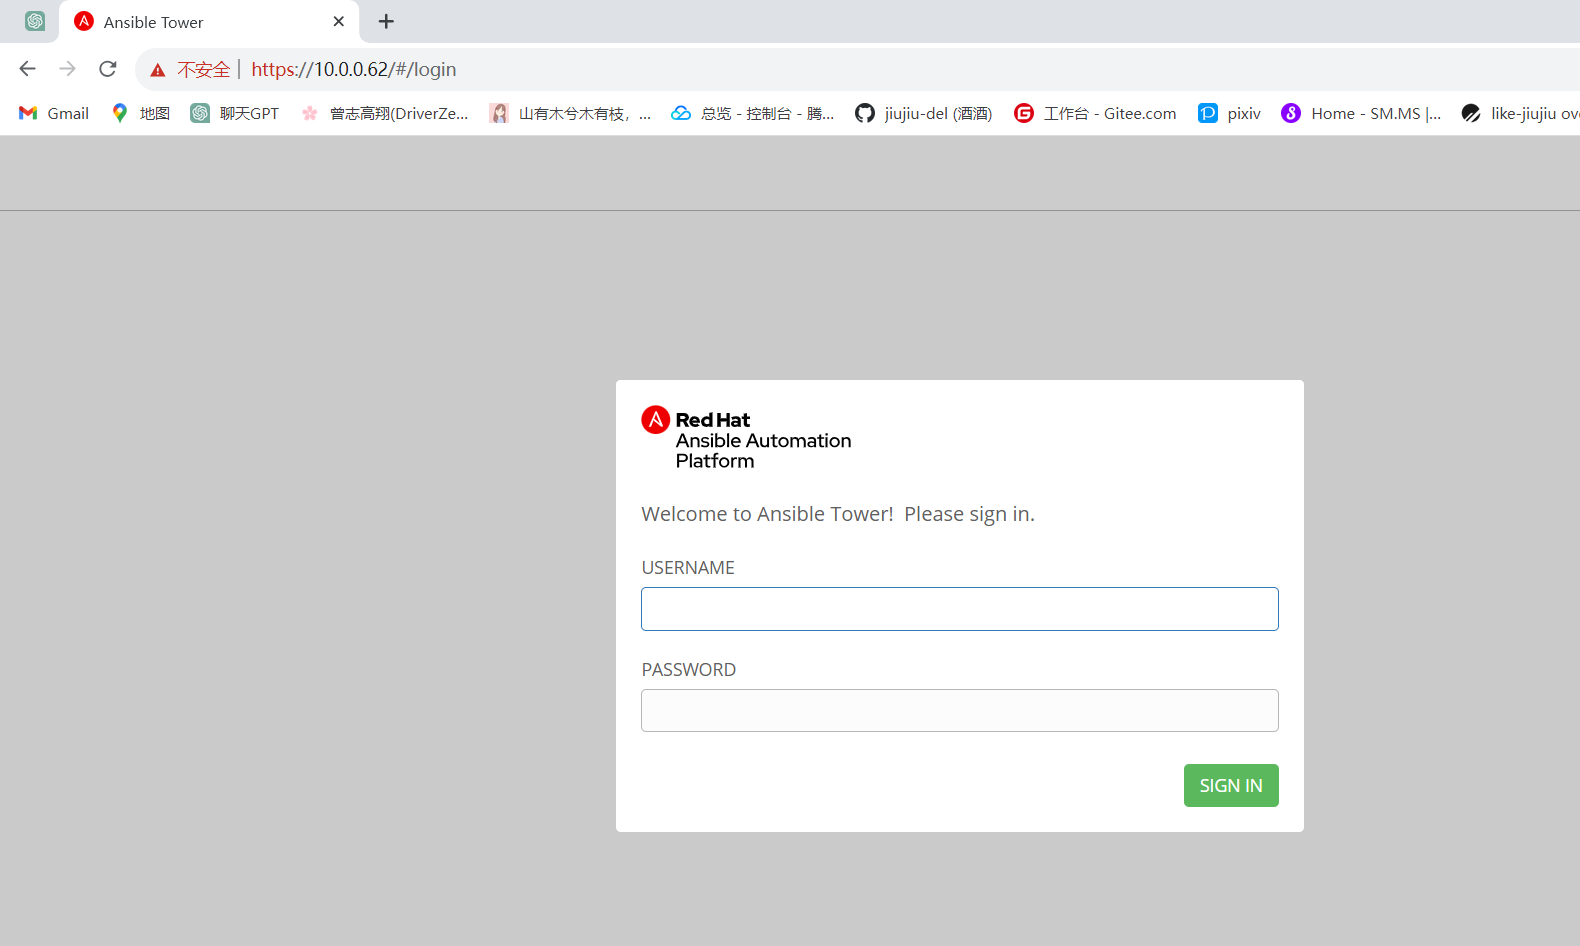
admin_password='123456'
pg_password='awx'
rabbitmq_password='awx'
# 3.安装
[root@m02 ansible-tower-setup-bundle-3.6.2-1]# ./setup.sh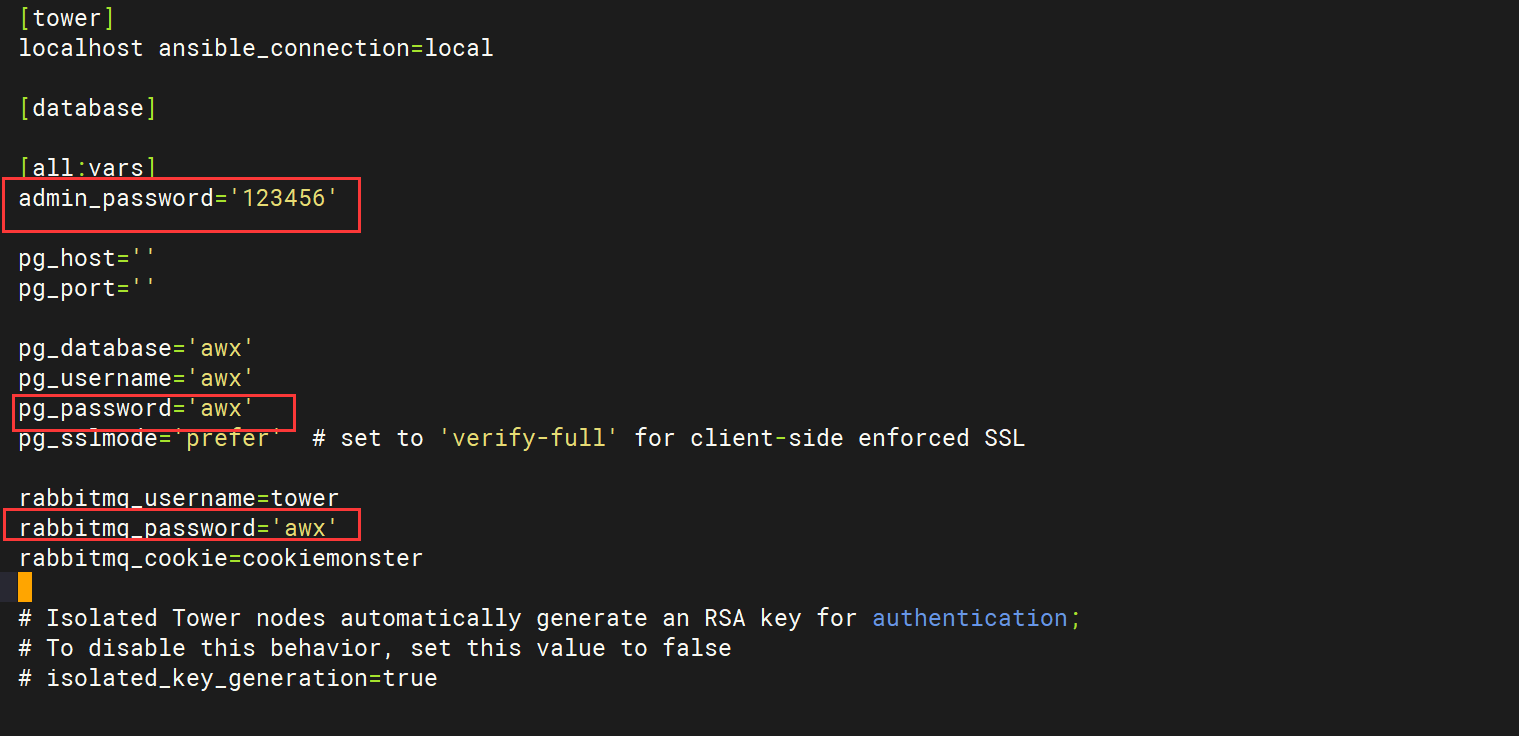
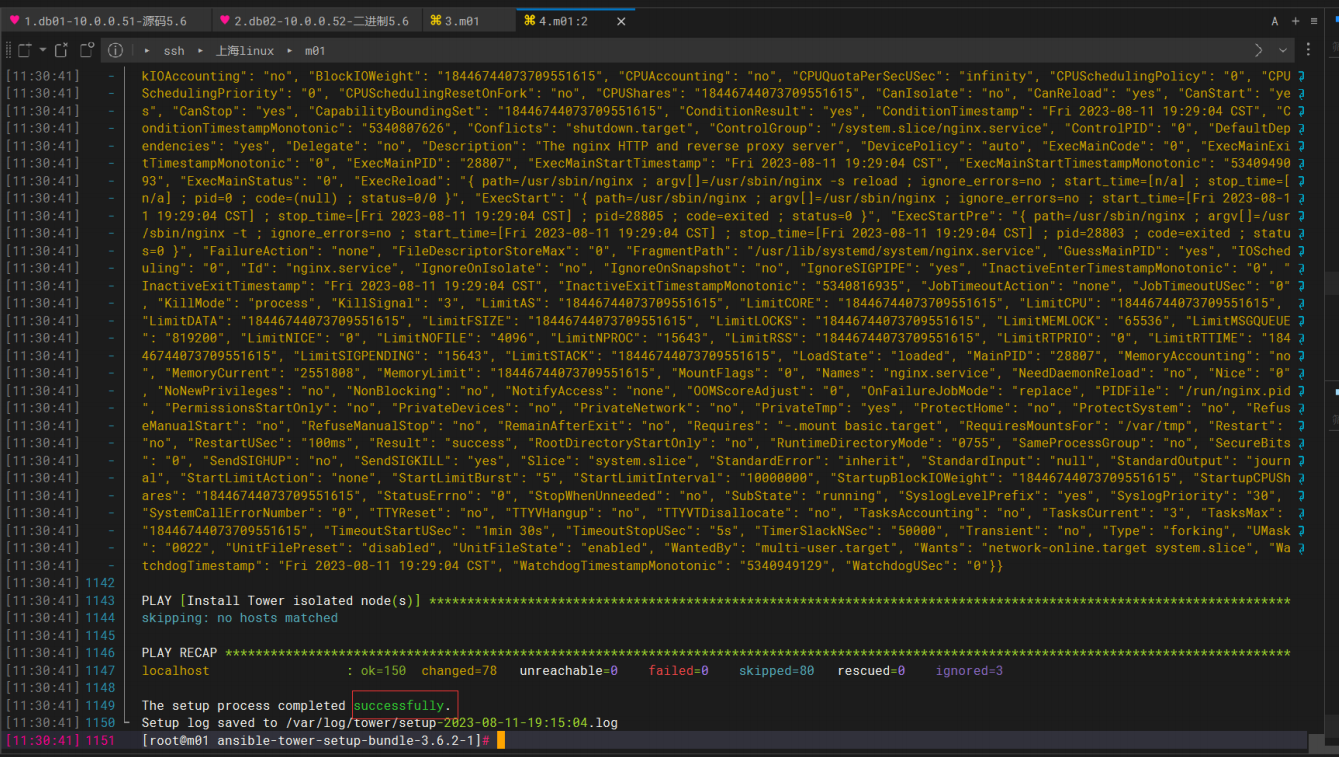
打开浏览器:https://10.0.0.62
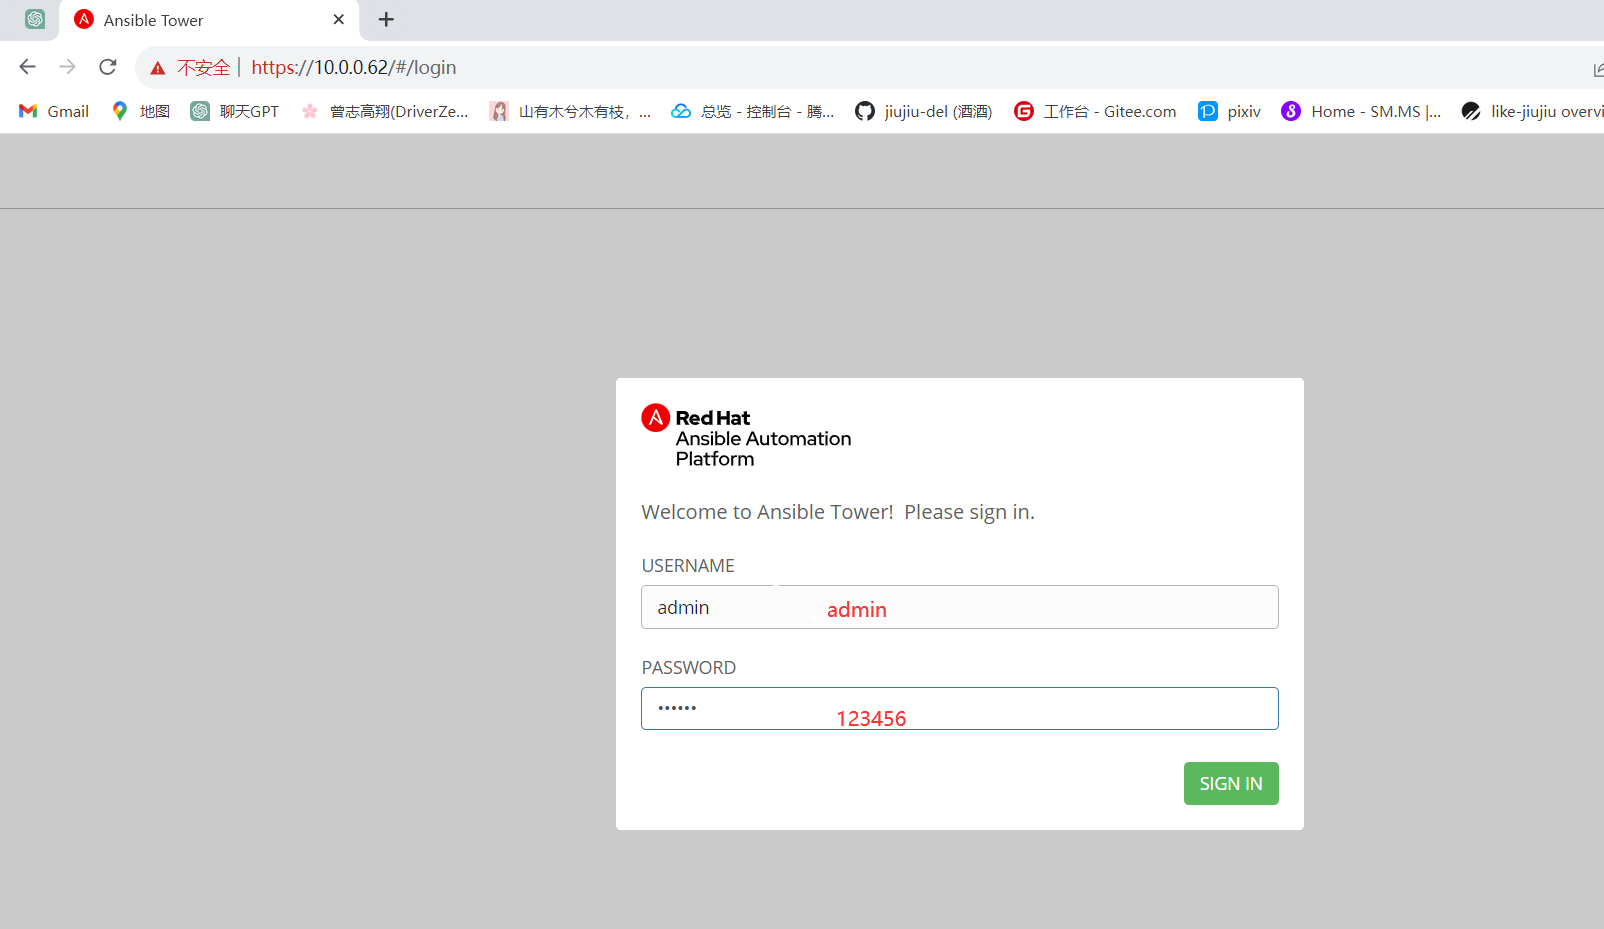
收费页面: //需购买证书后填写证书码
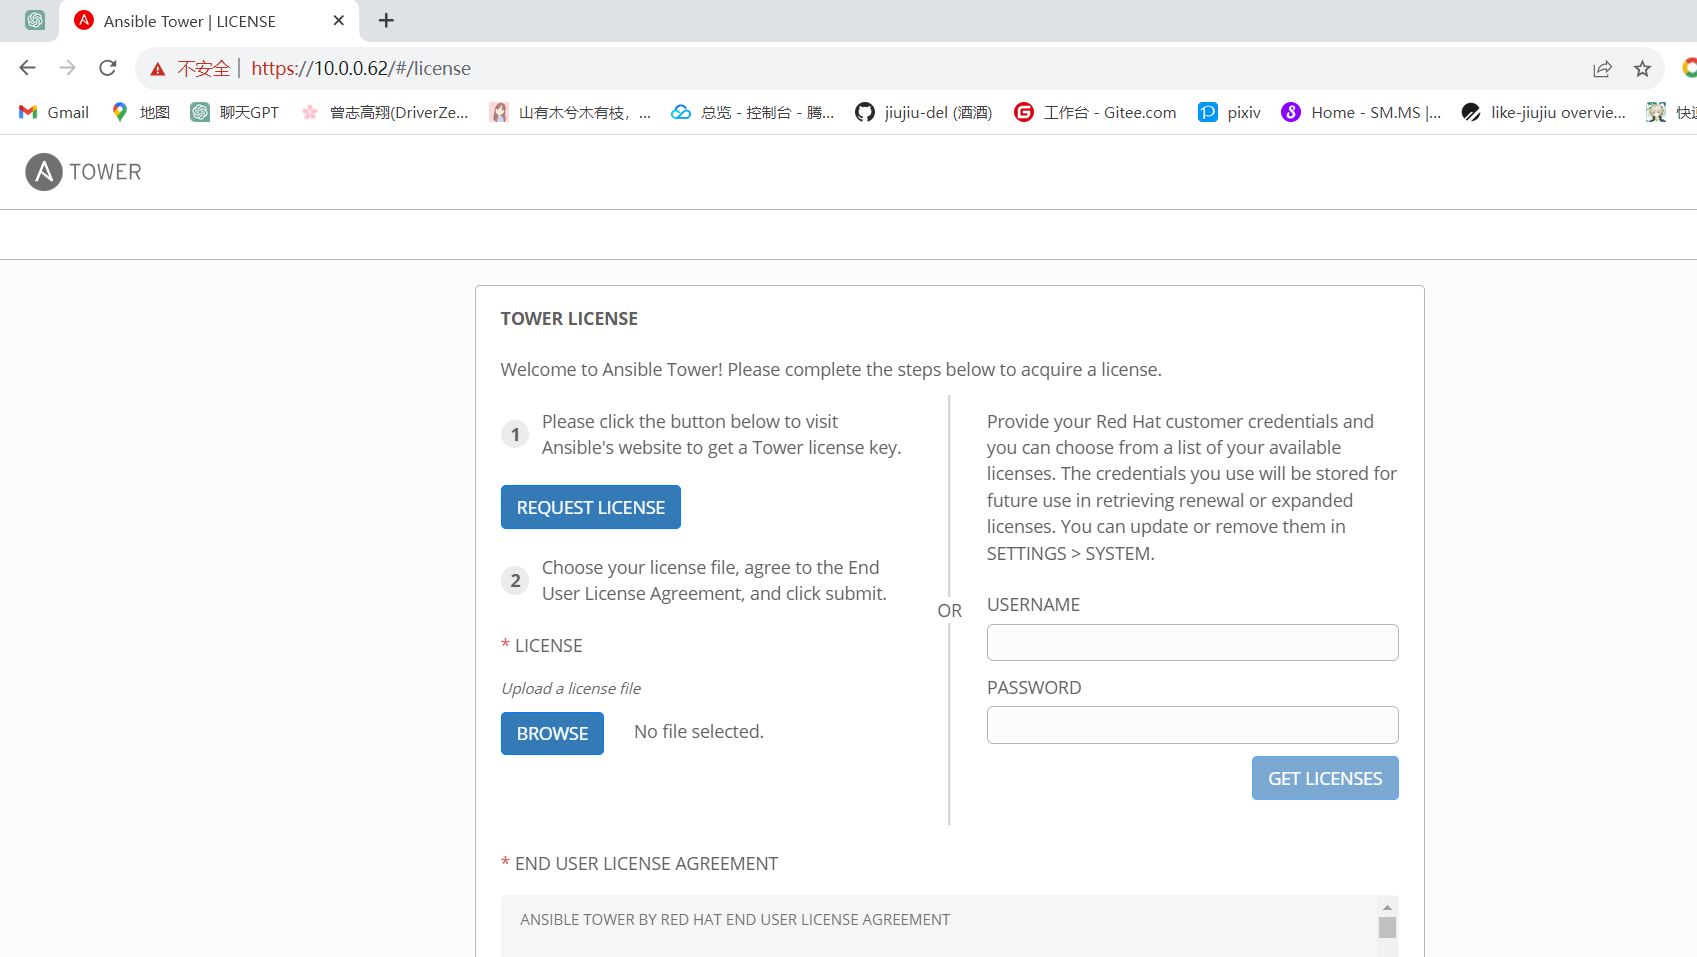
破解 ansible Tower
# 1.进入证书目录
[root@m02 ansible-tower-setup-bundle-3.6.2-1]# cd /var/lib/awx/venv/awx/lib/python3.6/site-packages/tower_license
# 2.下载pip  //可以忽略,下面下载得python36包含pip模块
wget https://bootstrap.pypa.io/get-pip.py
# 3.安装python3.6环境
[root@m02 tower_license]# yum install -y python36-devel
# 4.安装反编译模块  //二选一下载即可
[root@m02 tower_license]# pip3 install uncompyle6
[root@m02 tower_license]# pip3 install uncompyle6 -i https://pypi.tuna.tsinghua.edu.cn/simple some-package
# 5.反编译
[root@m02 tower_license]# uncompyle6 __init__.pyc > __init__.py
# 6.改代码  //一定注意缩进的格式的书写,空格缩进
[root@m02 tower_license]# vim __init__.py
    def _check_cloudforms_subscription(self):
        return True    #// 添加此行,不经过判断,直接return True
        if os.path.exists('/var/lib/awx/i18n.db'):
            return True
        else:
            if os.path.isdir('/opt/rh/cfme-appliance'):
                if os.path.isdir('/opt/rh/cfme-gemset'):
                    try:
                        has_rpms = subprocess.call(["'rpm'", "'--quiet'", "'-q'", "'cfme'", "'cfme-appliance'",
                         "'cfme-gemset'"])
                        if has_rpms == 0:
                            return True
                    except OSError:
                        pass

            return False
# 7.备份源代码
[root@m02 tower_license]# mv __init__.pyc /tmp/
# 8.编译 pyc和pyo
[root@m02 tower_license]# python -m py_compile __init__.py
[root@m02 tower_license]# python -O -m py_compile __init__.py
[root@m02 tower_license]# rm -f __init__.py
[root@m02 tower_license]# ll
-rw-r--r-- 1 root root 9179 Aug 11 19:58 __init__.pyc
-rw-r--r-- 1 root root 9179 Aug 11 19:58 __init__.pyo
drwxr-xr-x 2 root root 37 Aug 11 19:18 __pycache__
# 9.重启ansible tower
[root@m02 tower_license]# ansible-tower-service restart
Restarting Tower
Redirecting to /bin/systemctl stop rh-postgresql10-postgresql.service
Redirecting to /bin/systemctl stop rabbitmq-server.service
Redirecting to /bin/systemctl stop nginx.service
Redirecting to /bin/systemctl stop supervisord.service
Redirecting to /bin/systemctl start rh-postgresql10-postgresql.service
Redirecting to /bin/systemctl start rabbitmq-server.service
Redirecting to /bin/systemctl start nginx.service
Redirecting to /bin/systemctl start supervisord.service
#10、重新访问网页
出现如下画面表示破解成功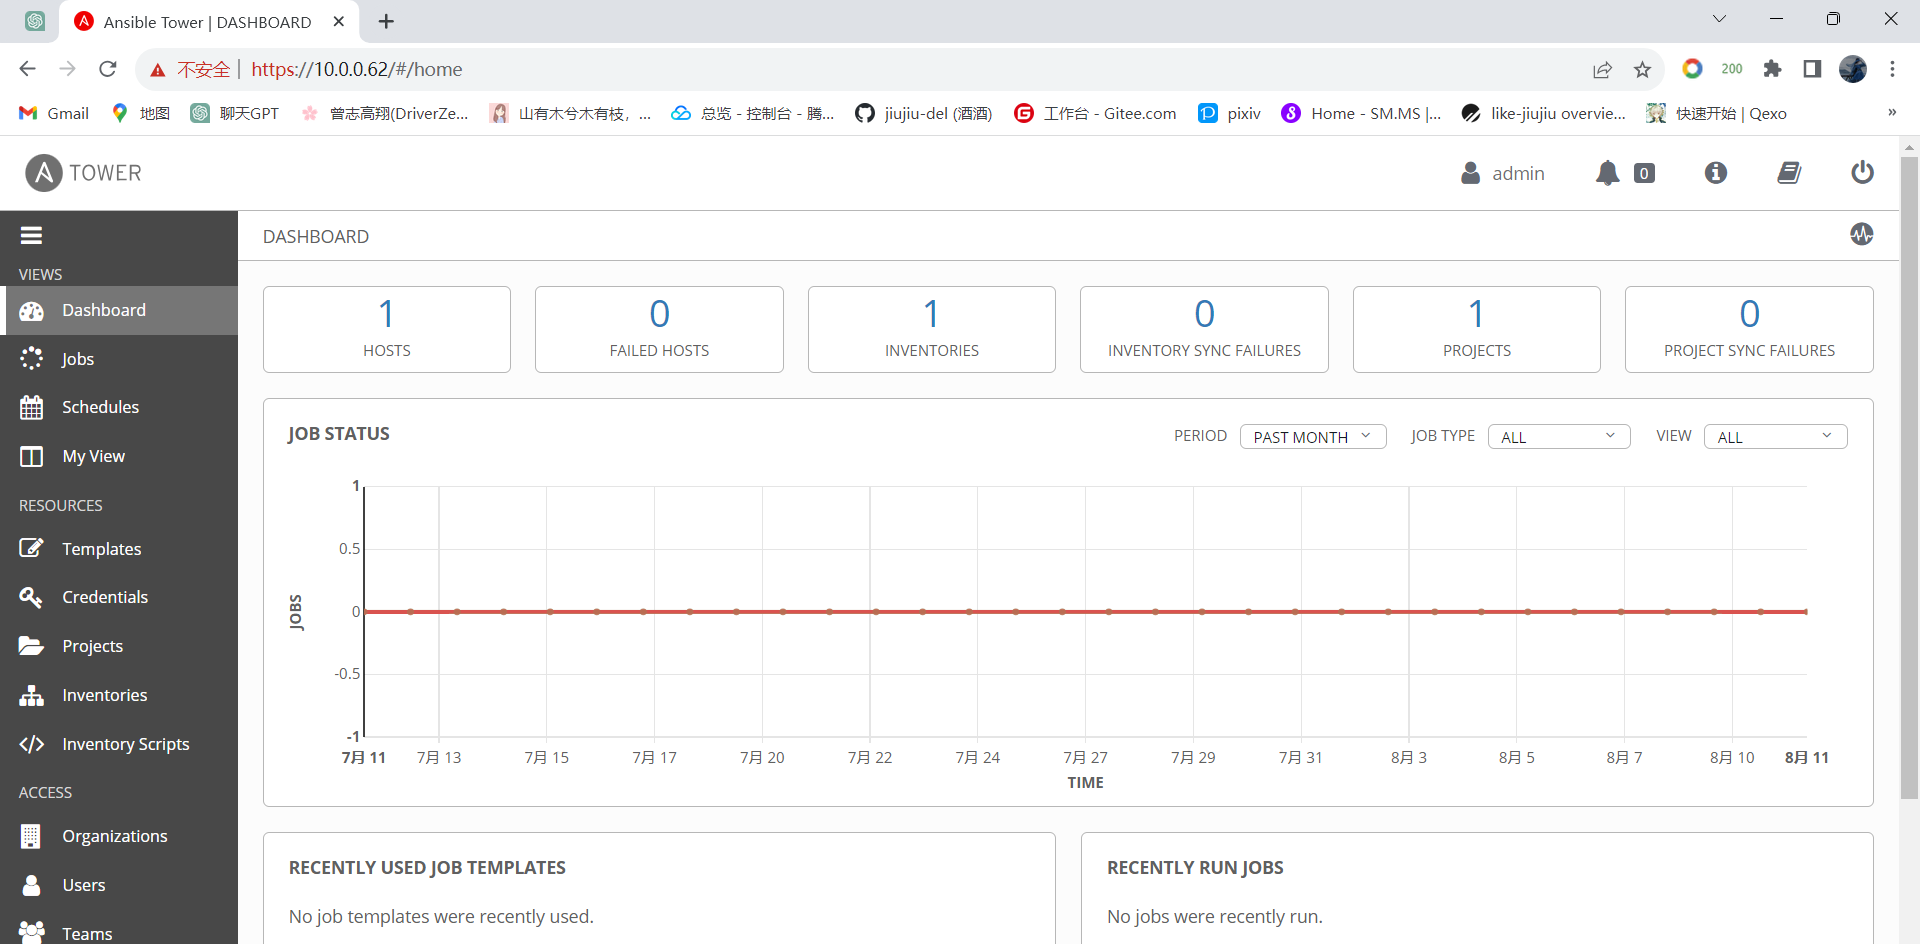
Ansible tower使用
在Tower中,创建了指定的项目目录:/var/lib/awx/projects,所以我们所有的playbook写在指定目录下
即可
注意:该目录下的所有目录或者文件,必须是awx的属主和属组
项目示例:
#进入/var/lib/awx/projects
[root@m02 tower_license]# cd /var/lib/awx/projects
[root@m02 projects]# pwd
/var/lib/awx/projects
## 安装apache
[root@m01 projects]# mkdir apache
[root@m01 projects]# vim apache/install.yml
- hosts: all
  tasks:
    - name: insatll httpd
      yum:
        name: httpd
        state: present
## 授权
[root@m01 projects]# chown -R awx.awx /var/lib/awx/projects/
网页图形化创建连接方式
选择CREDENTIALS:
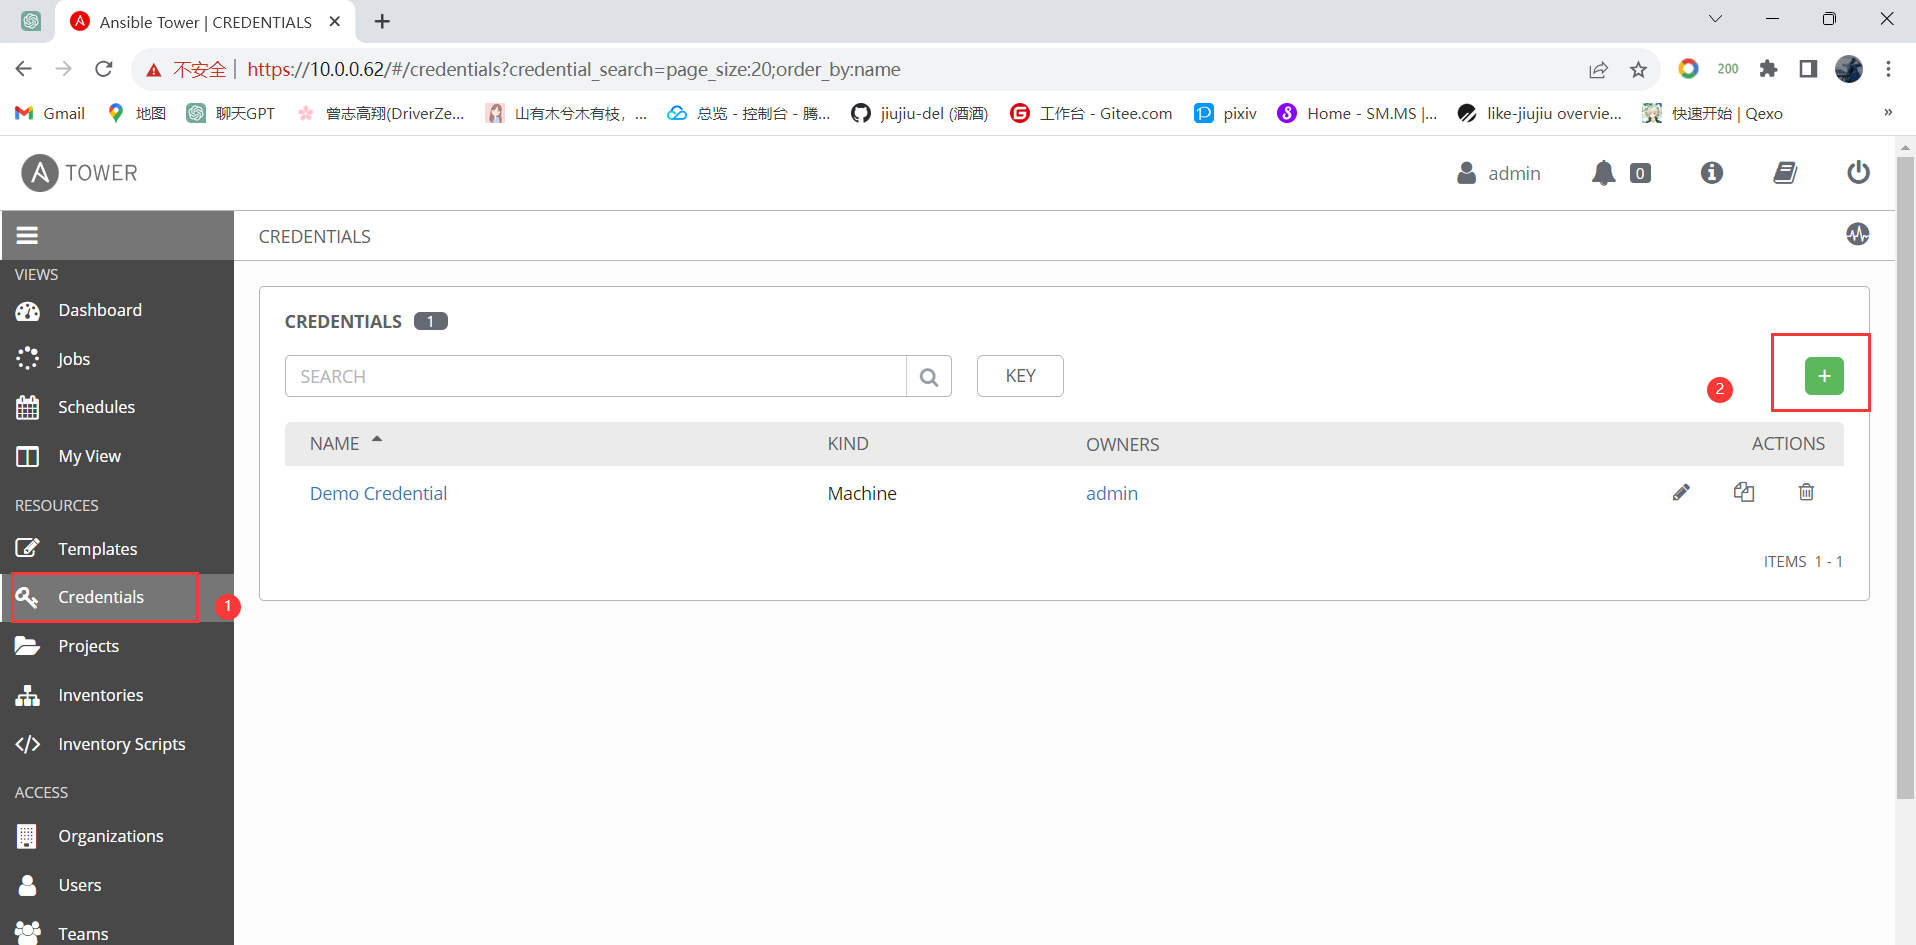
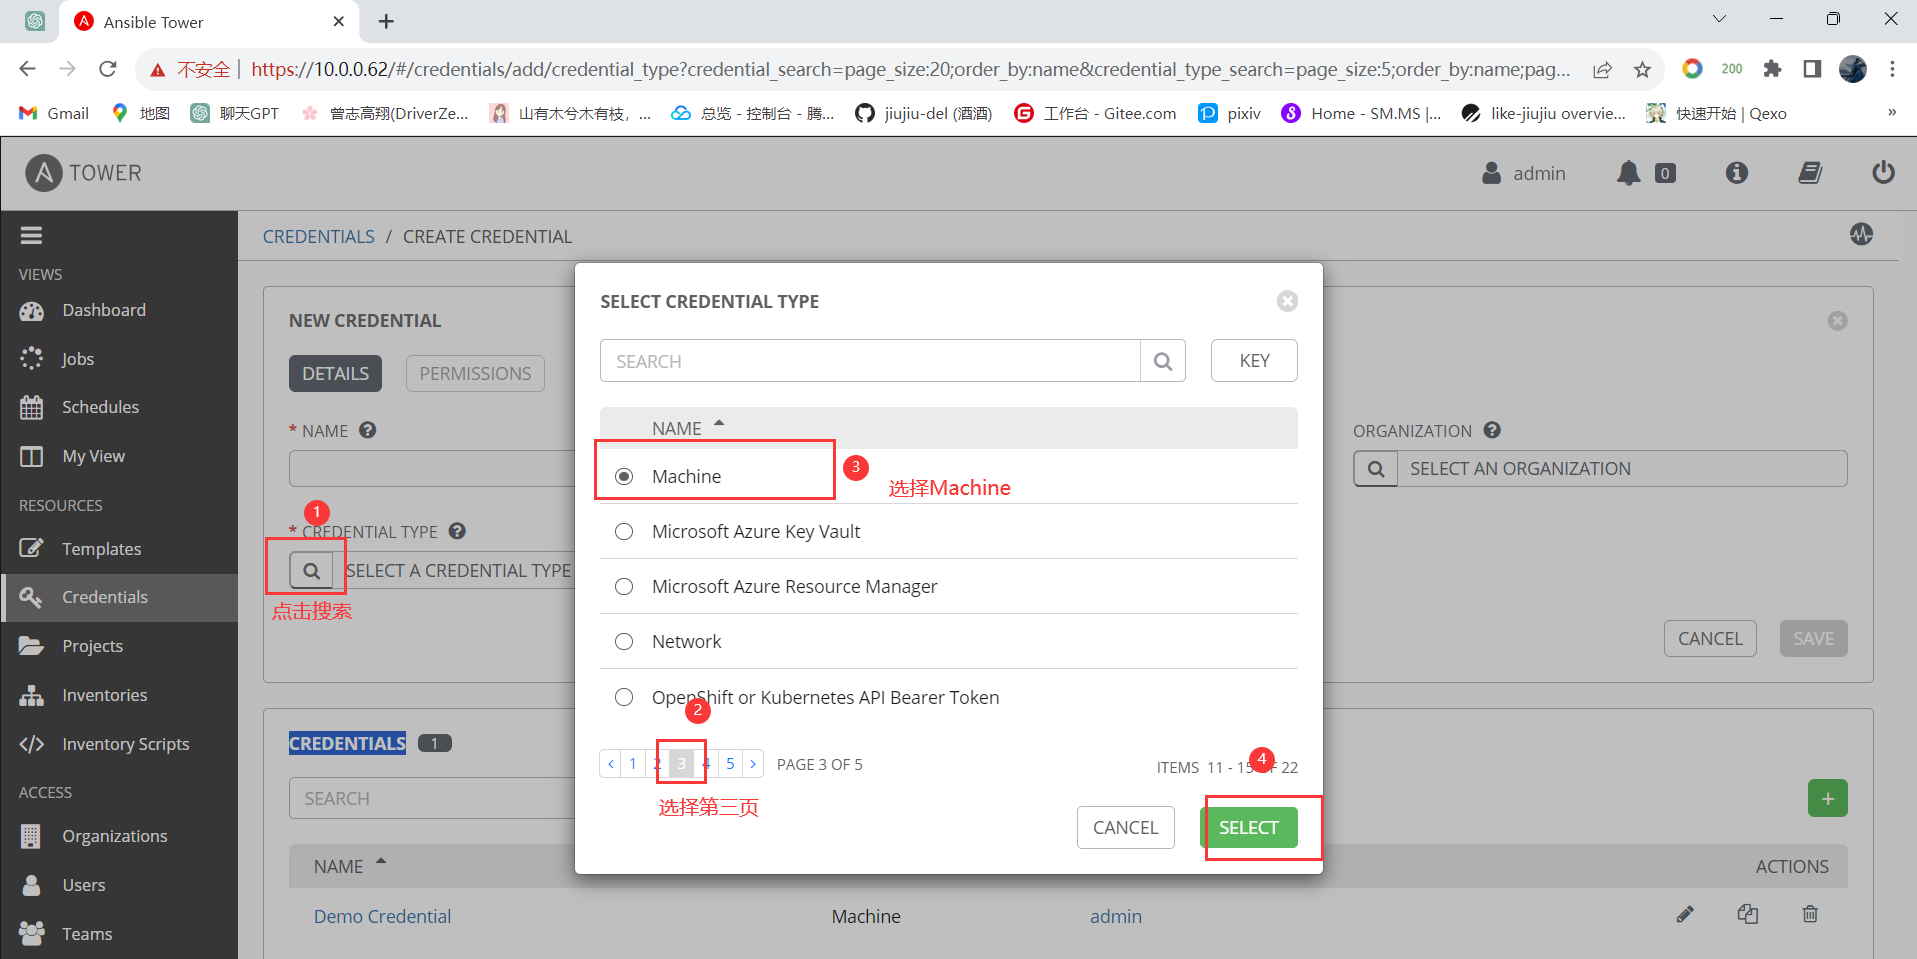
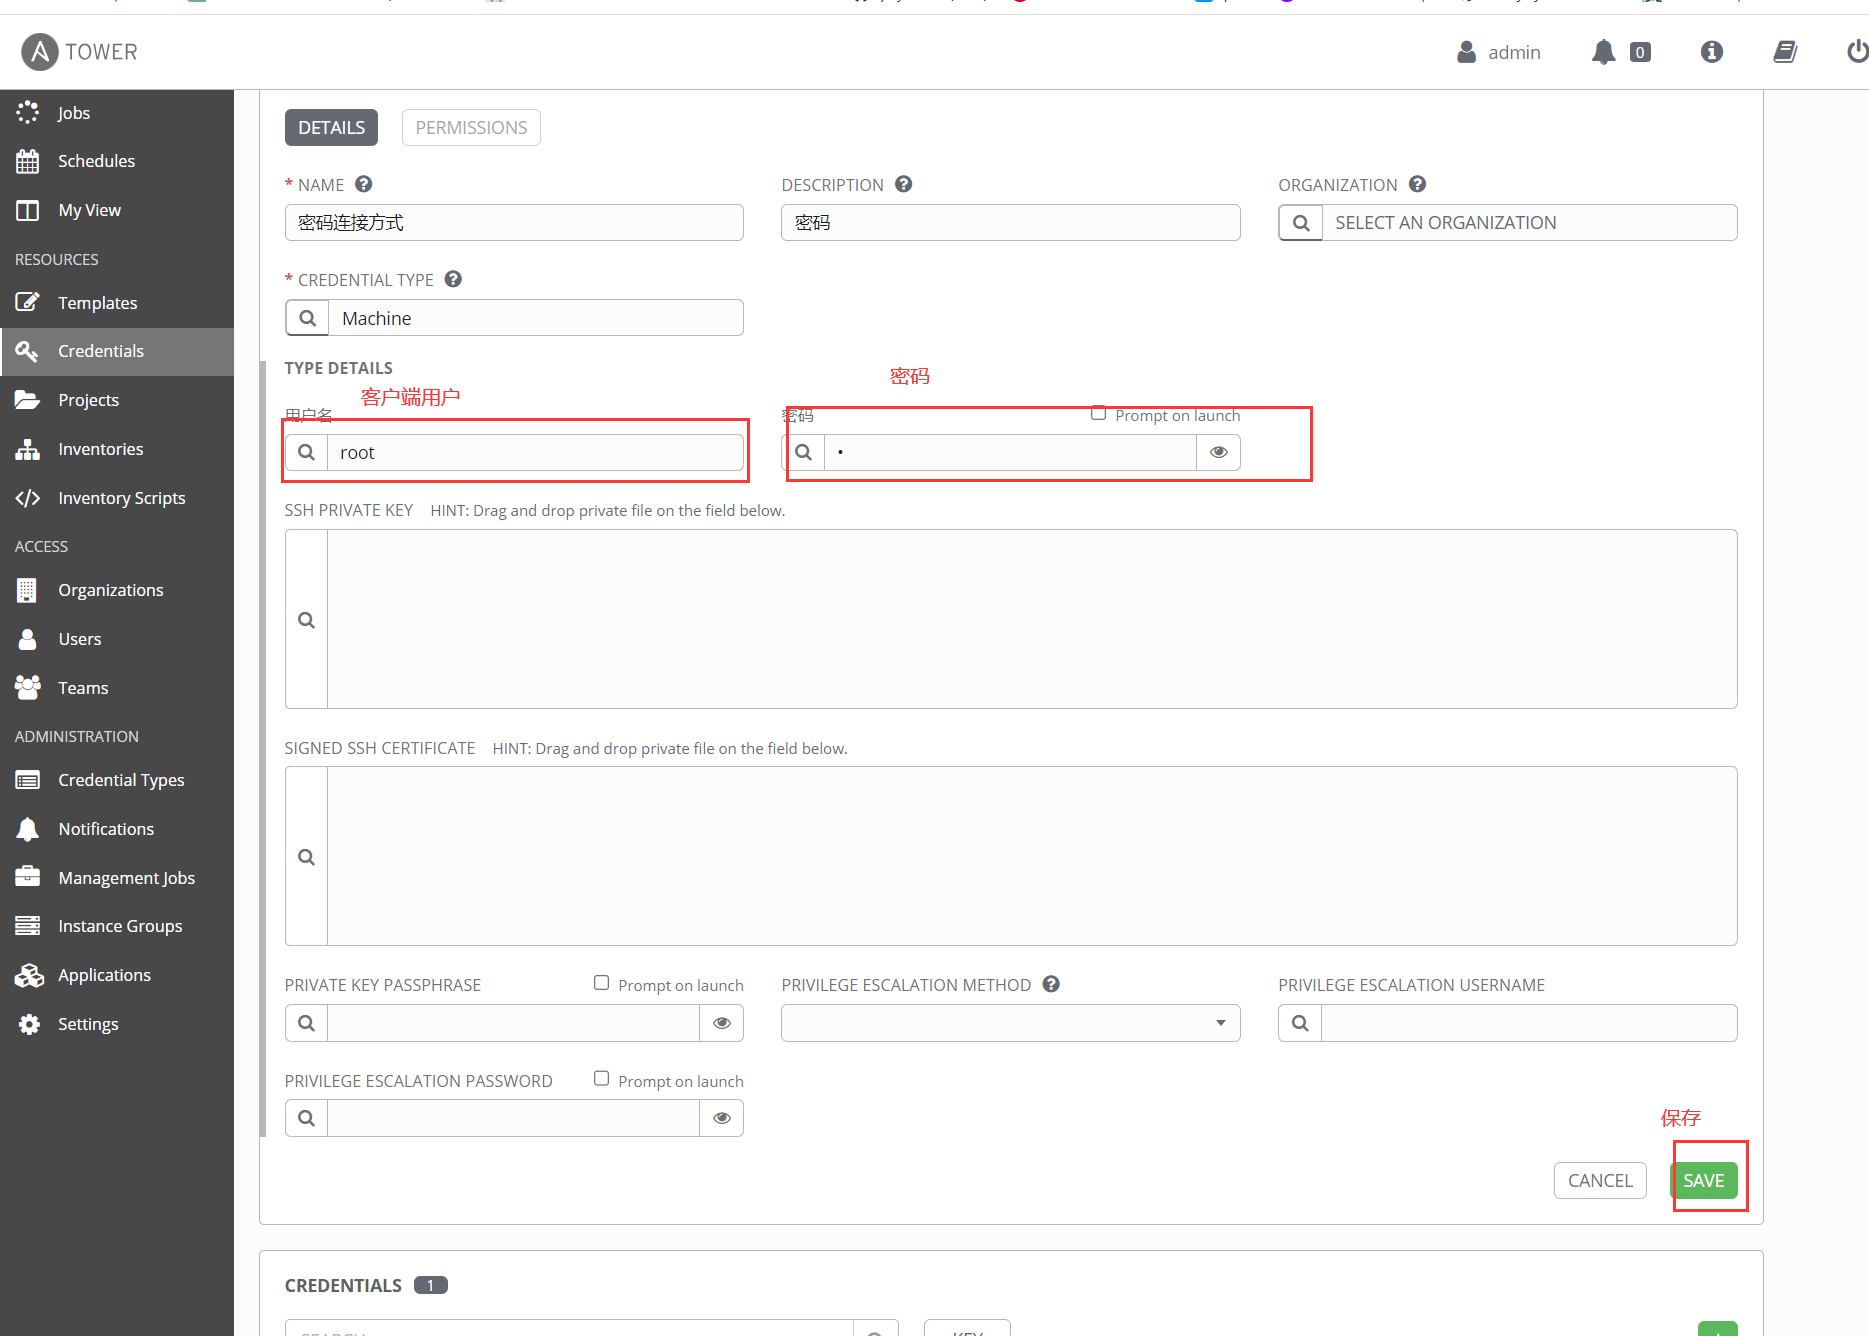
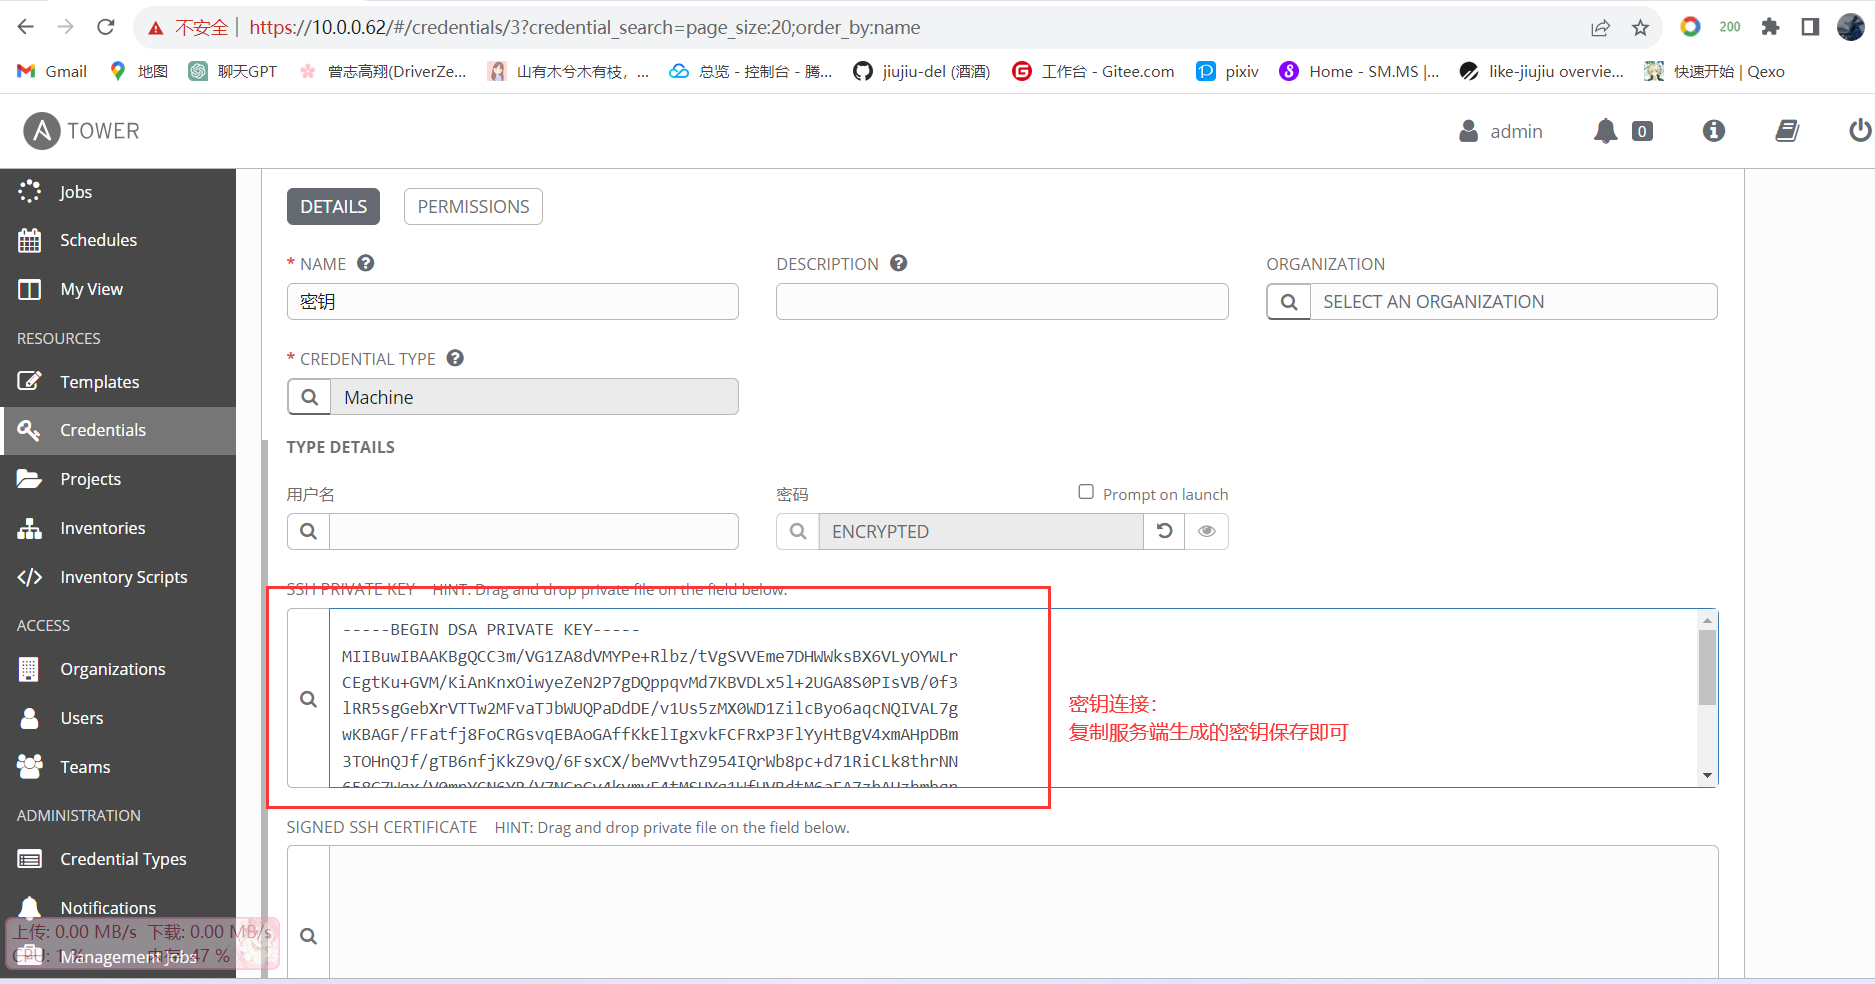
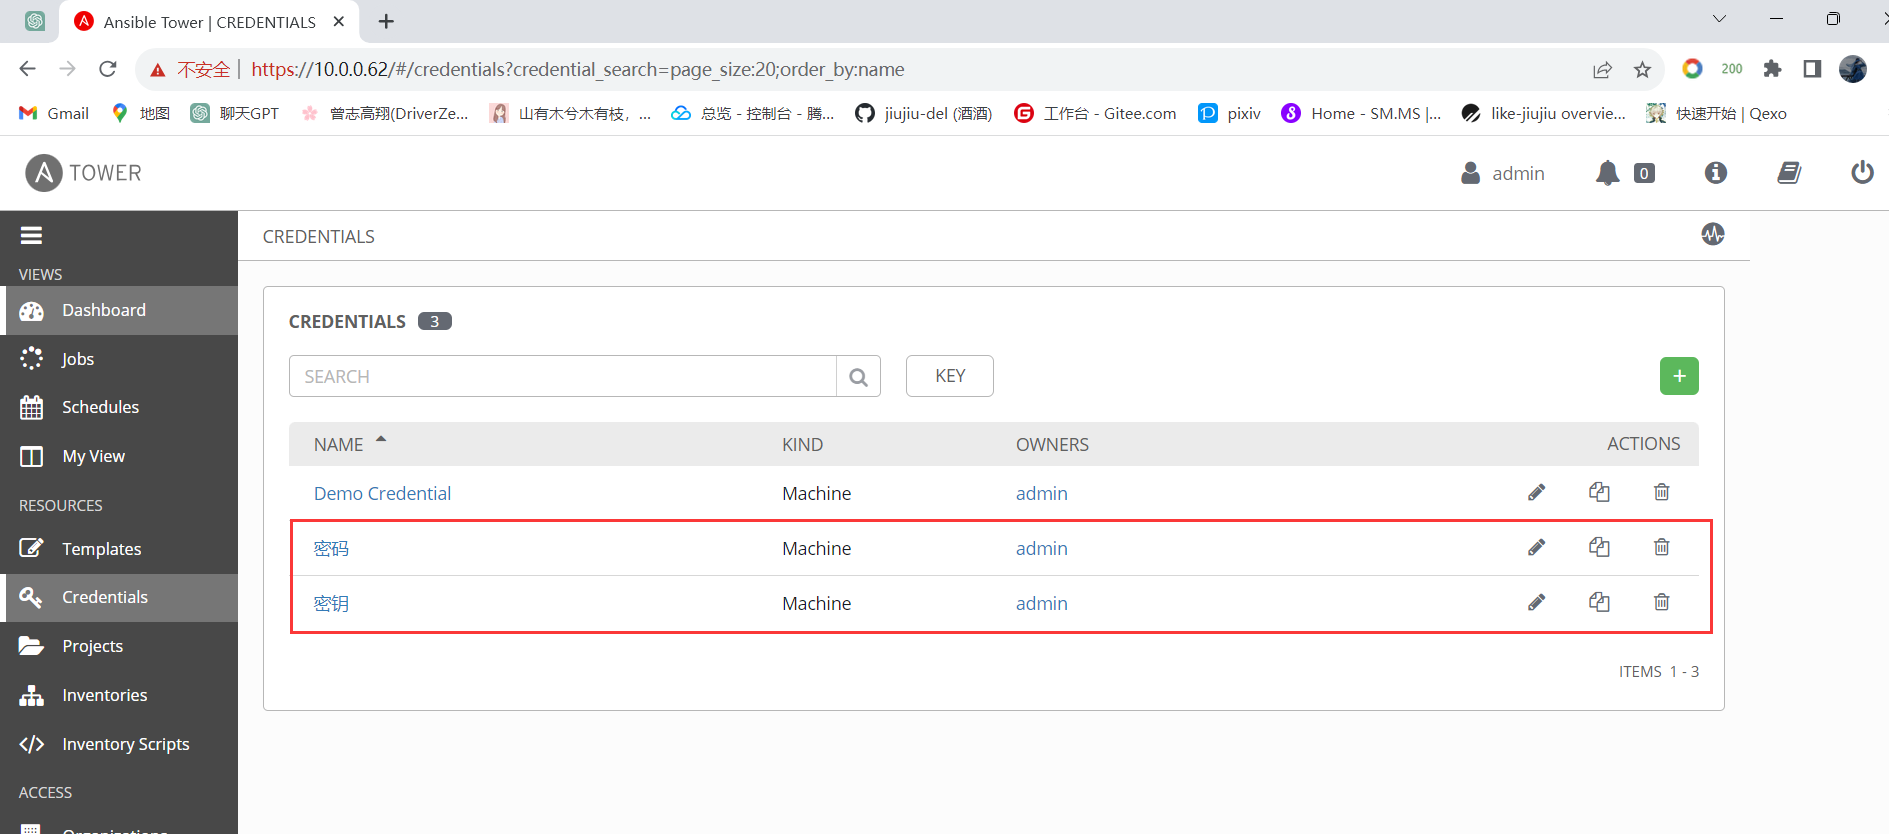
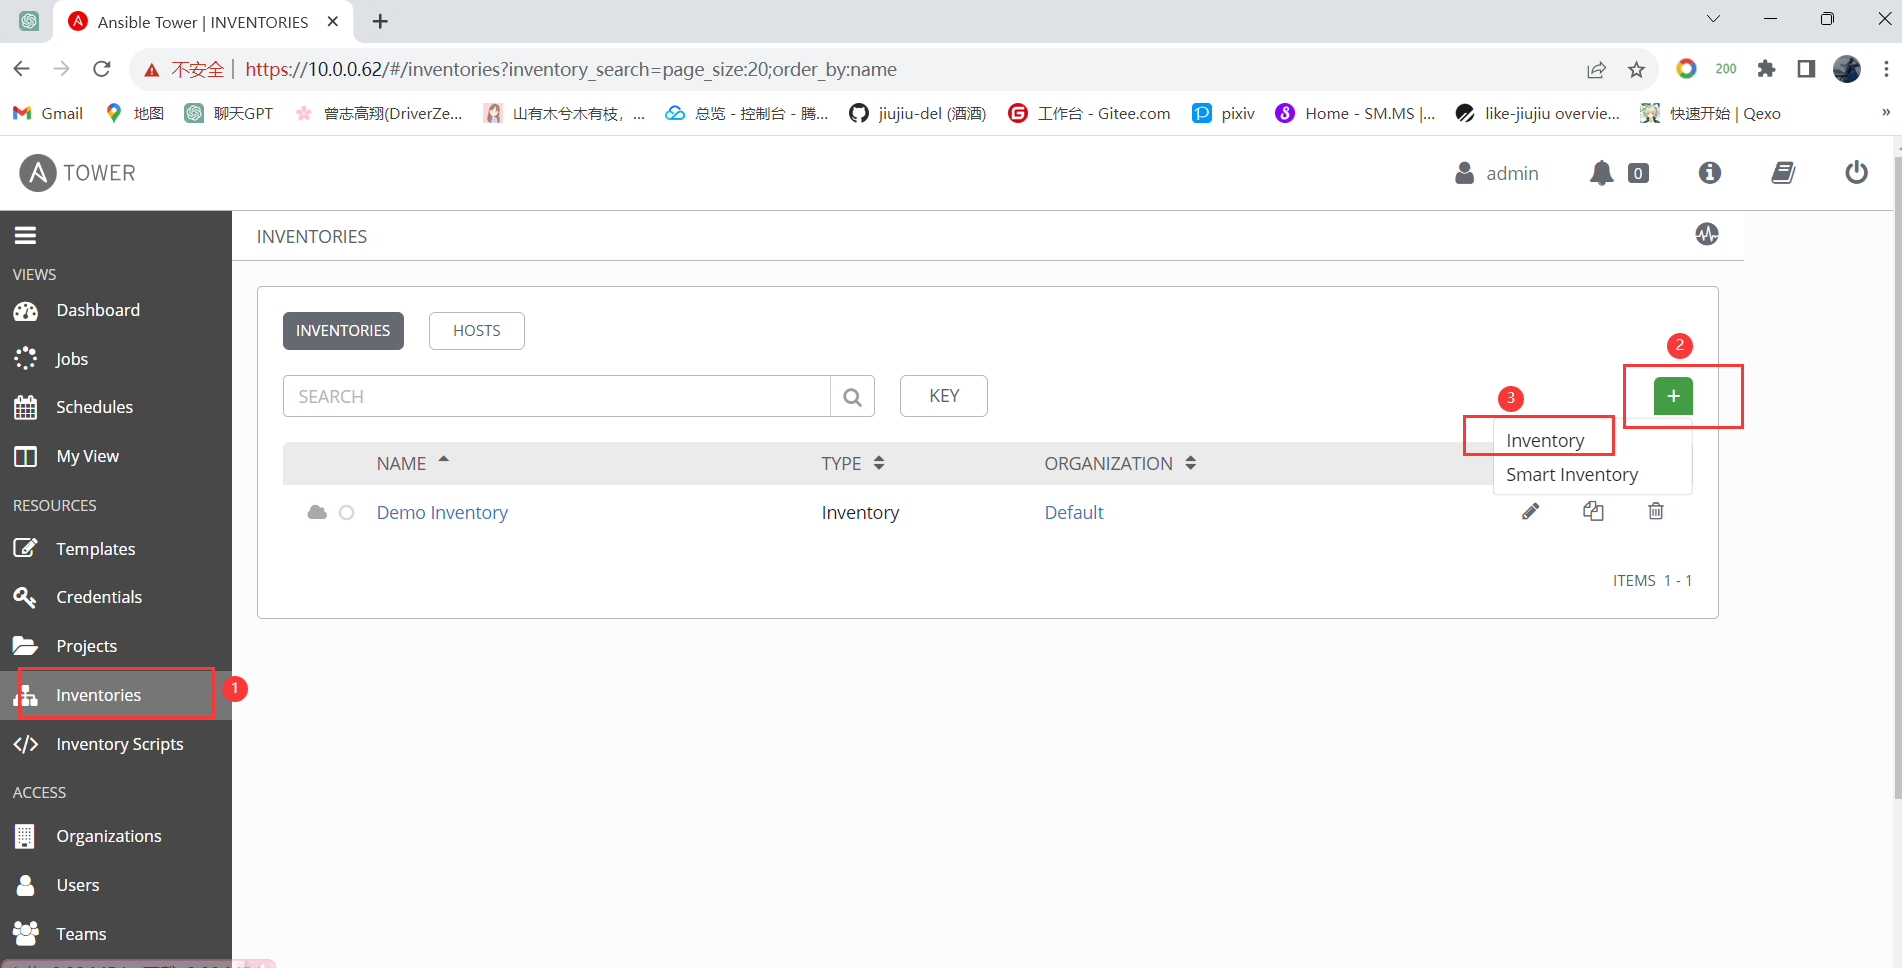
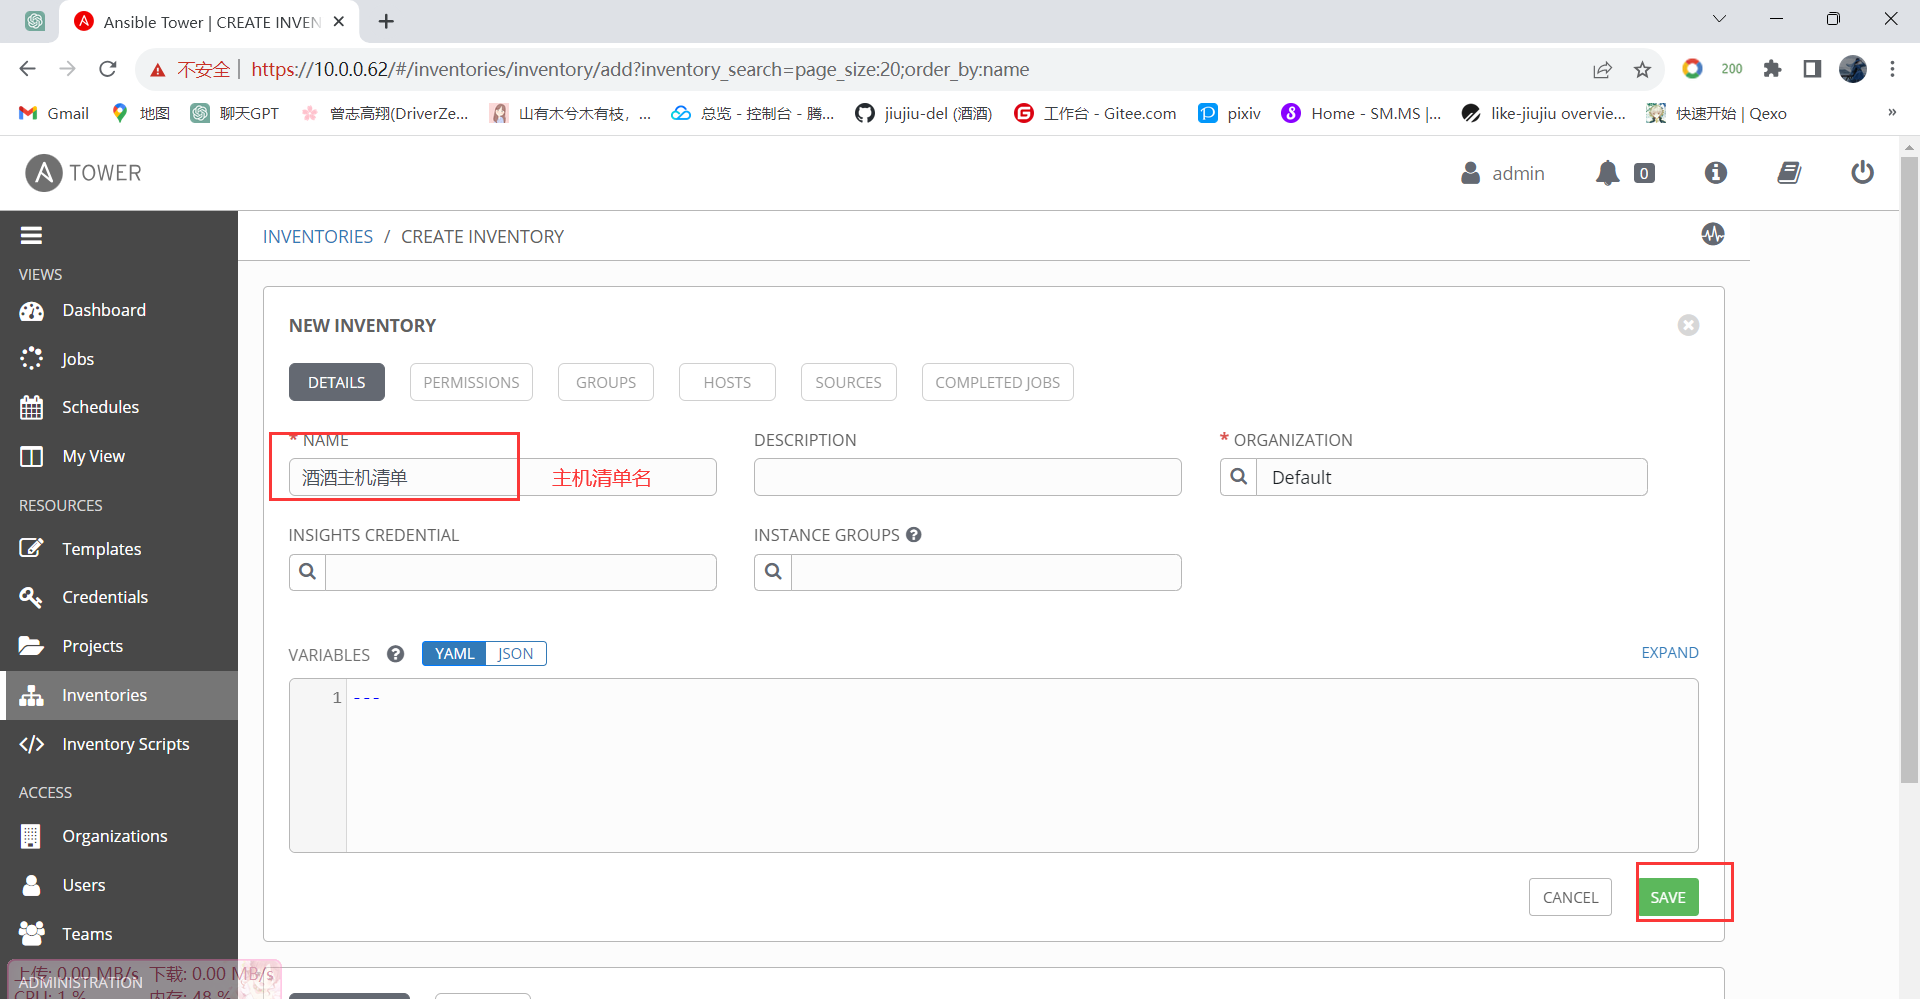
创建主机清单:
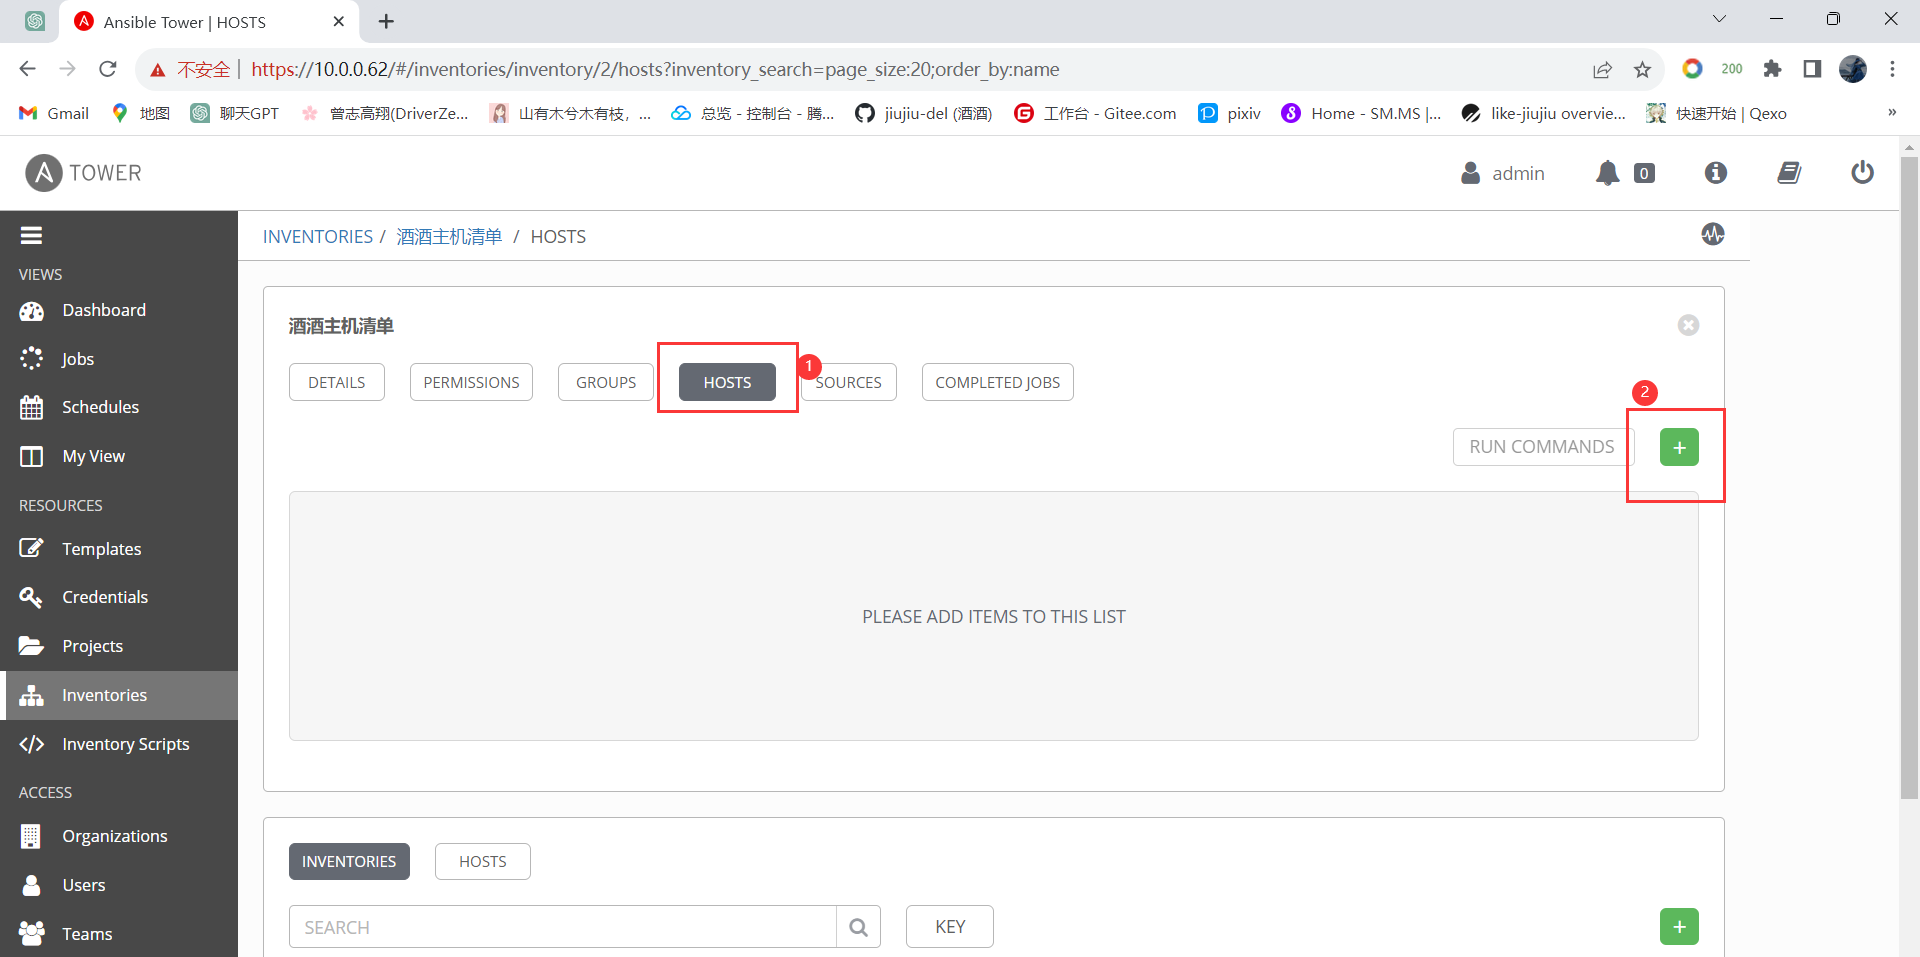
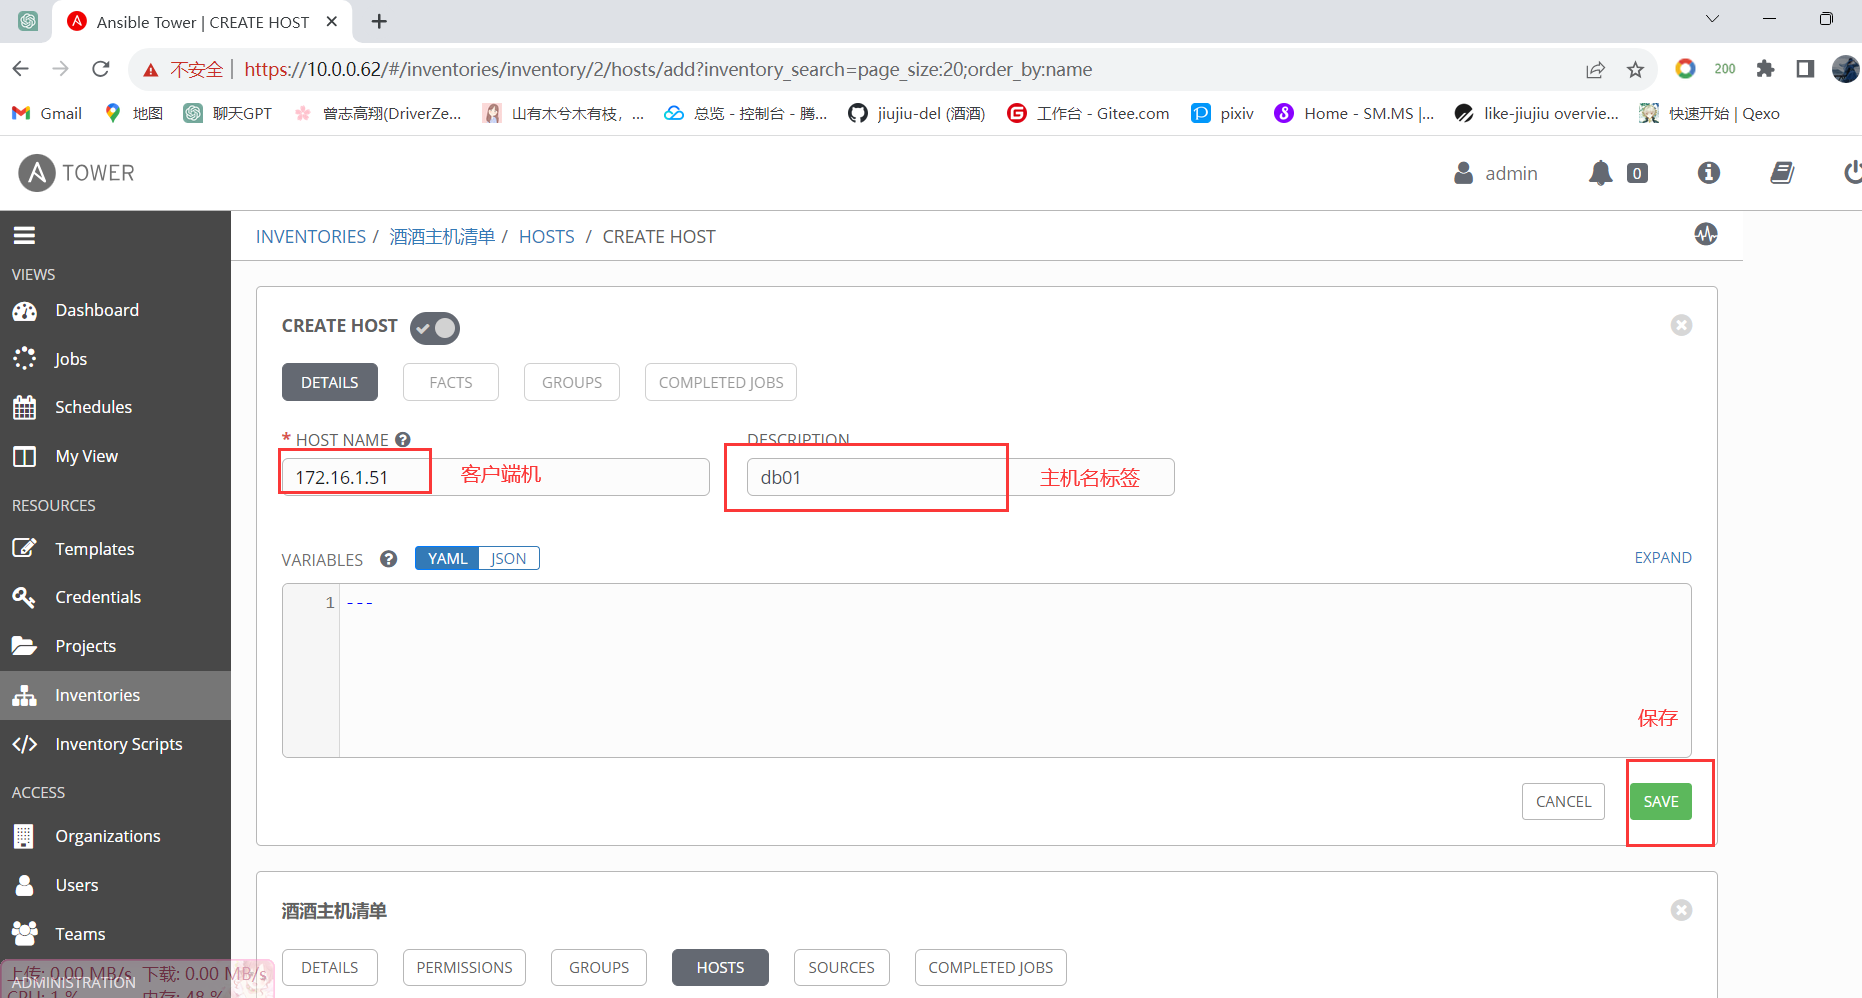
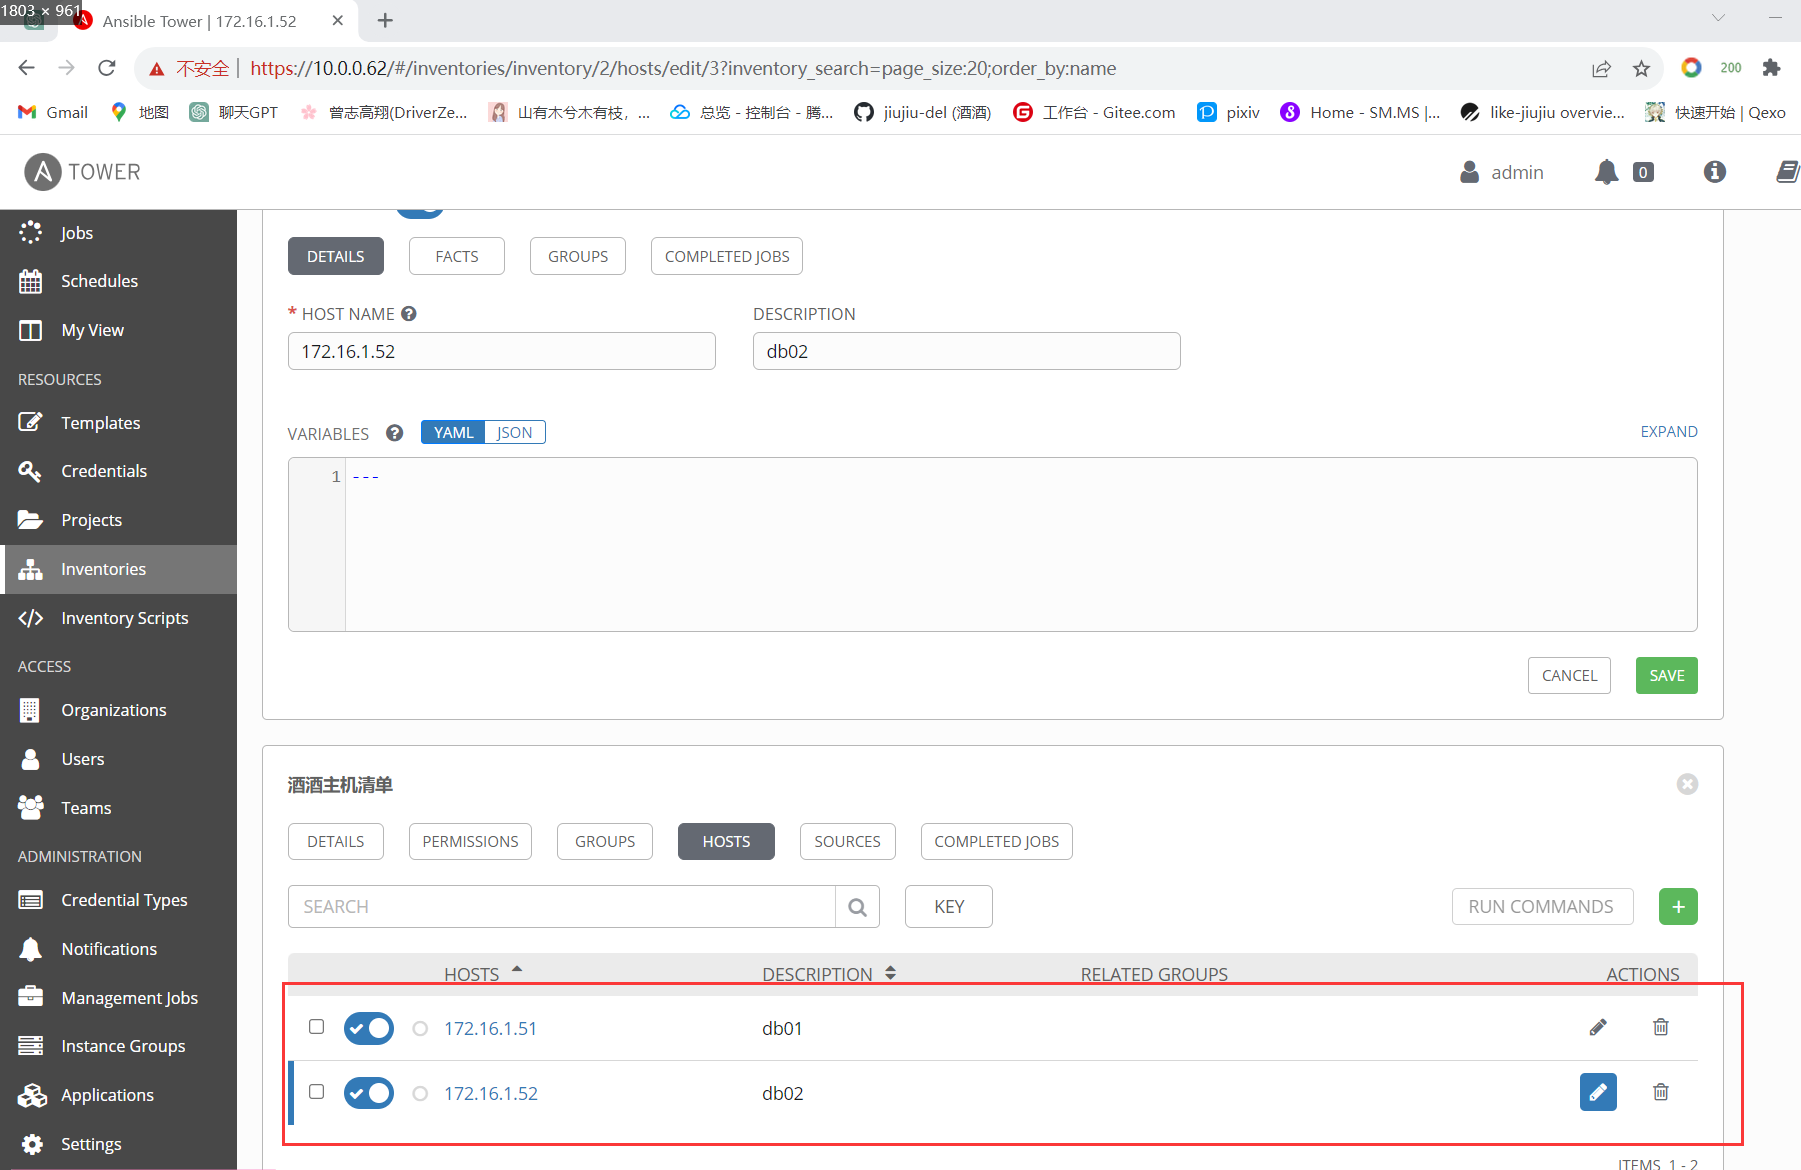
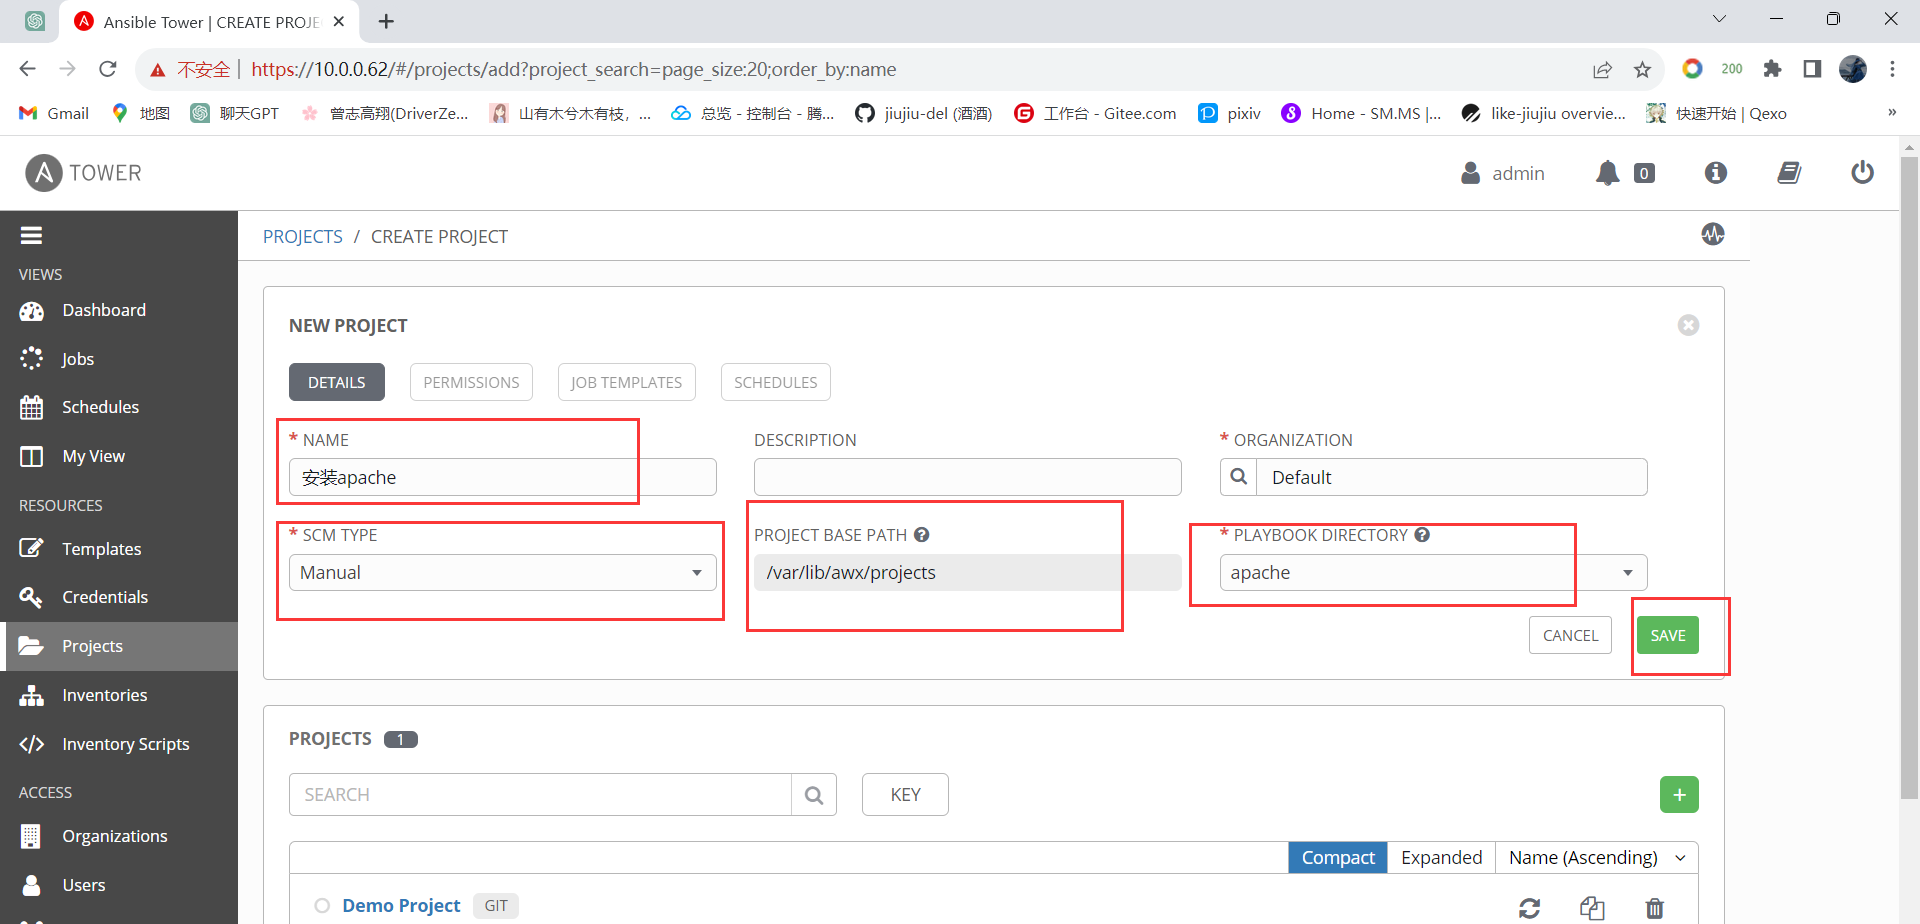
创建项目:
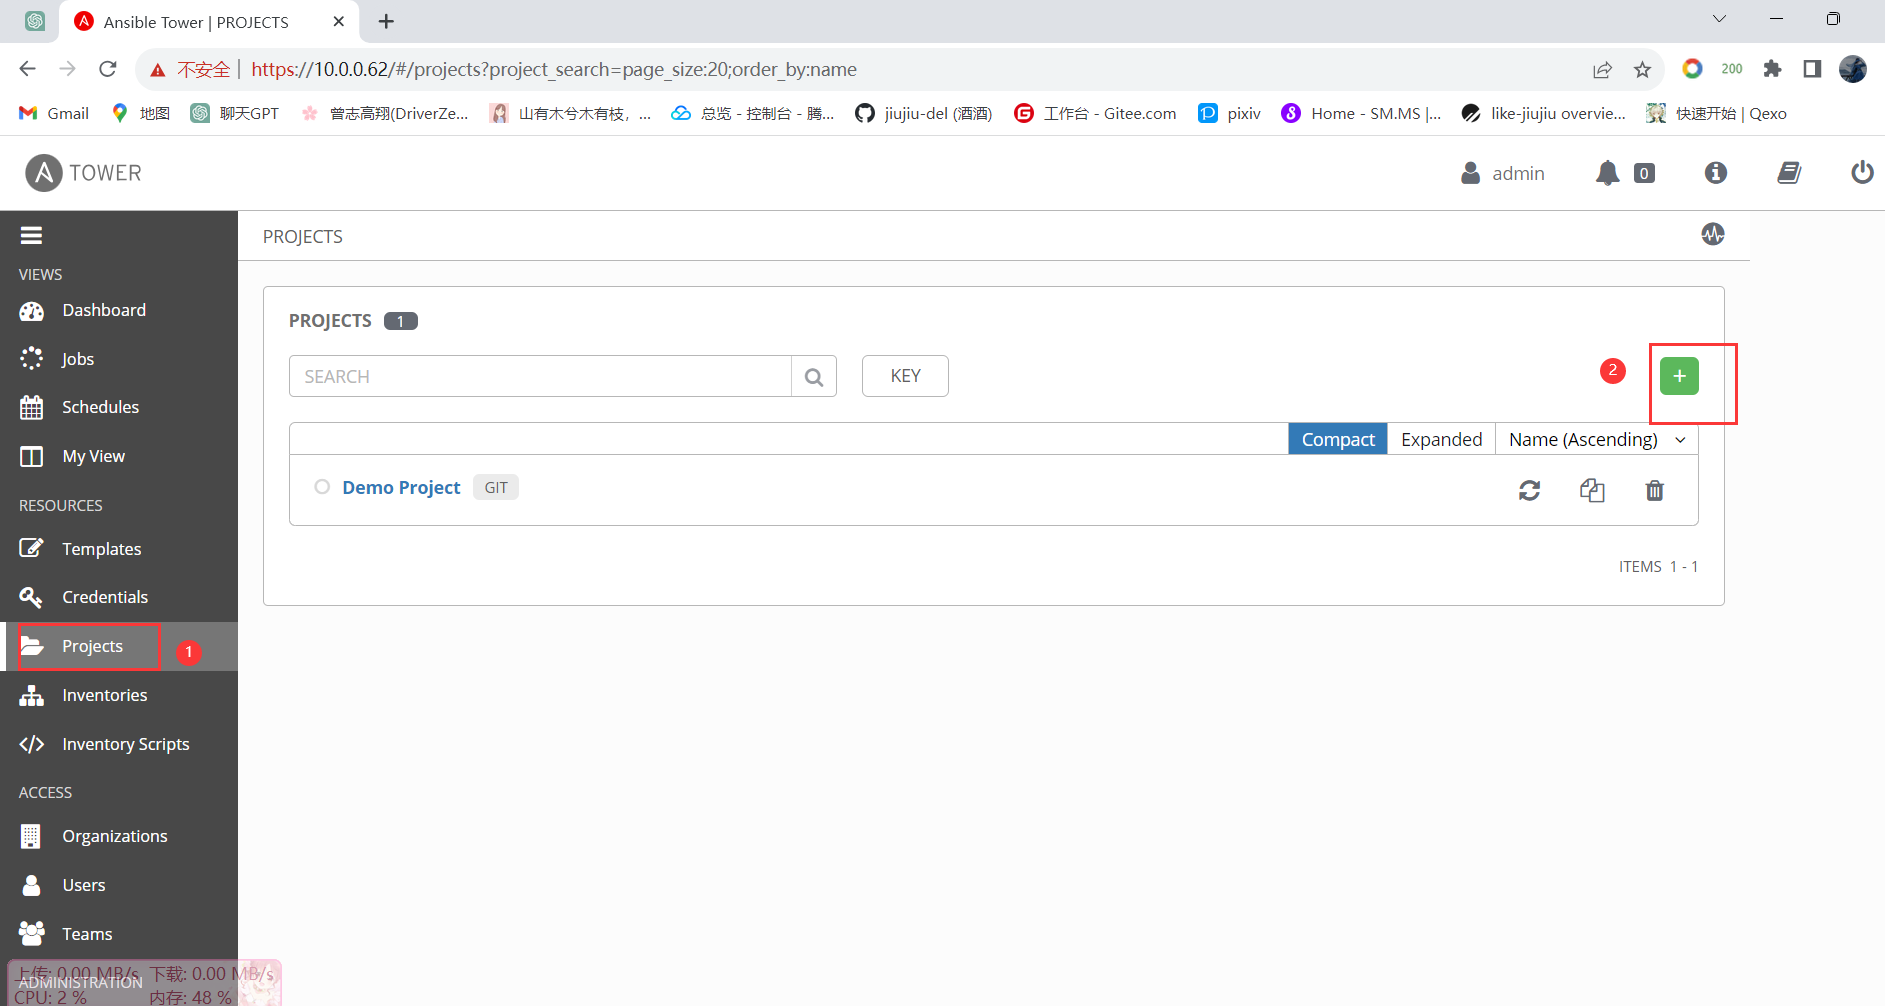
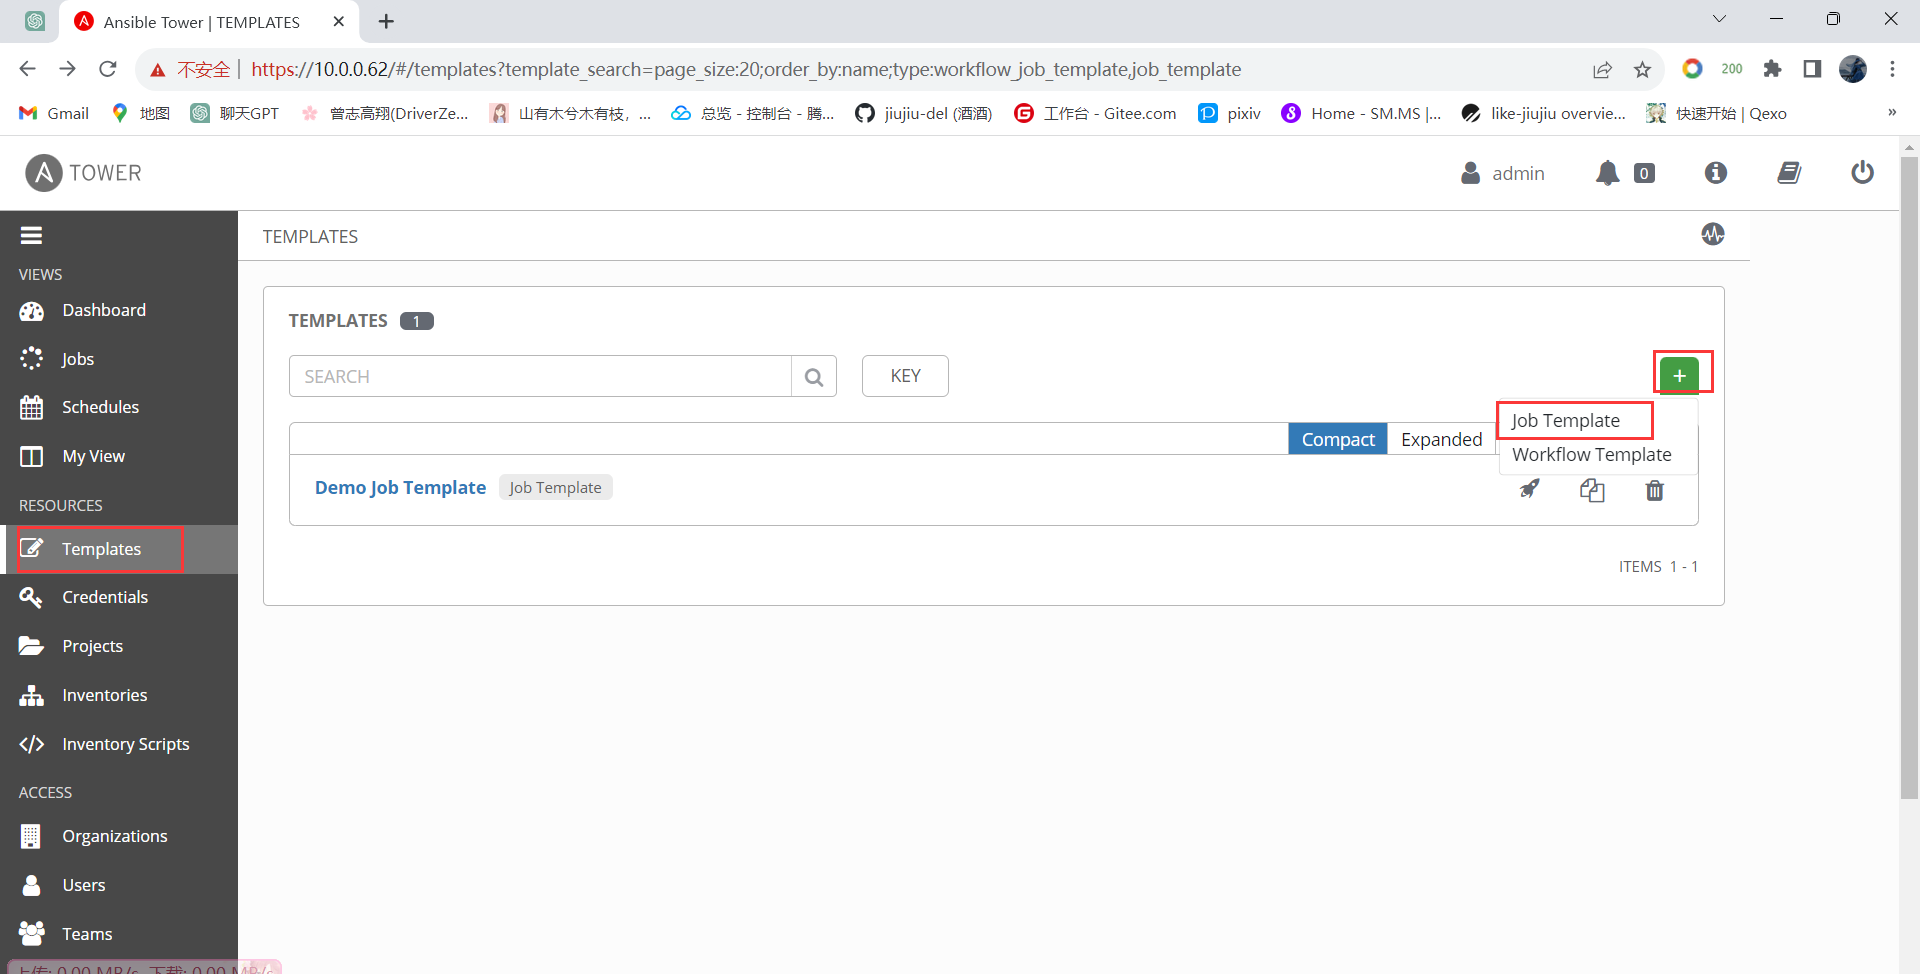
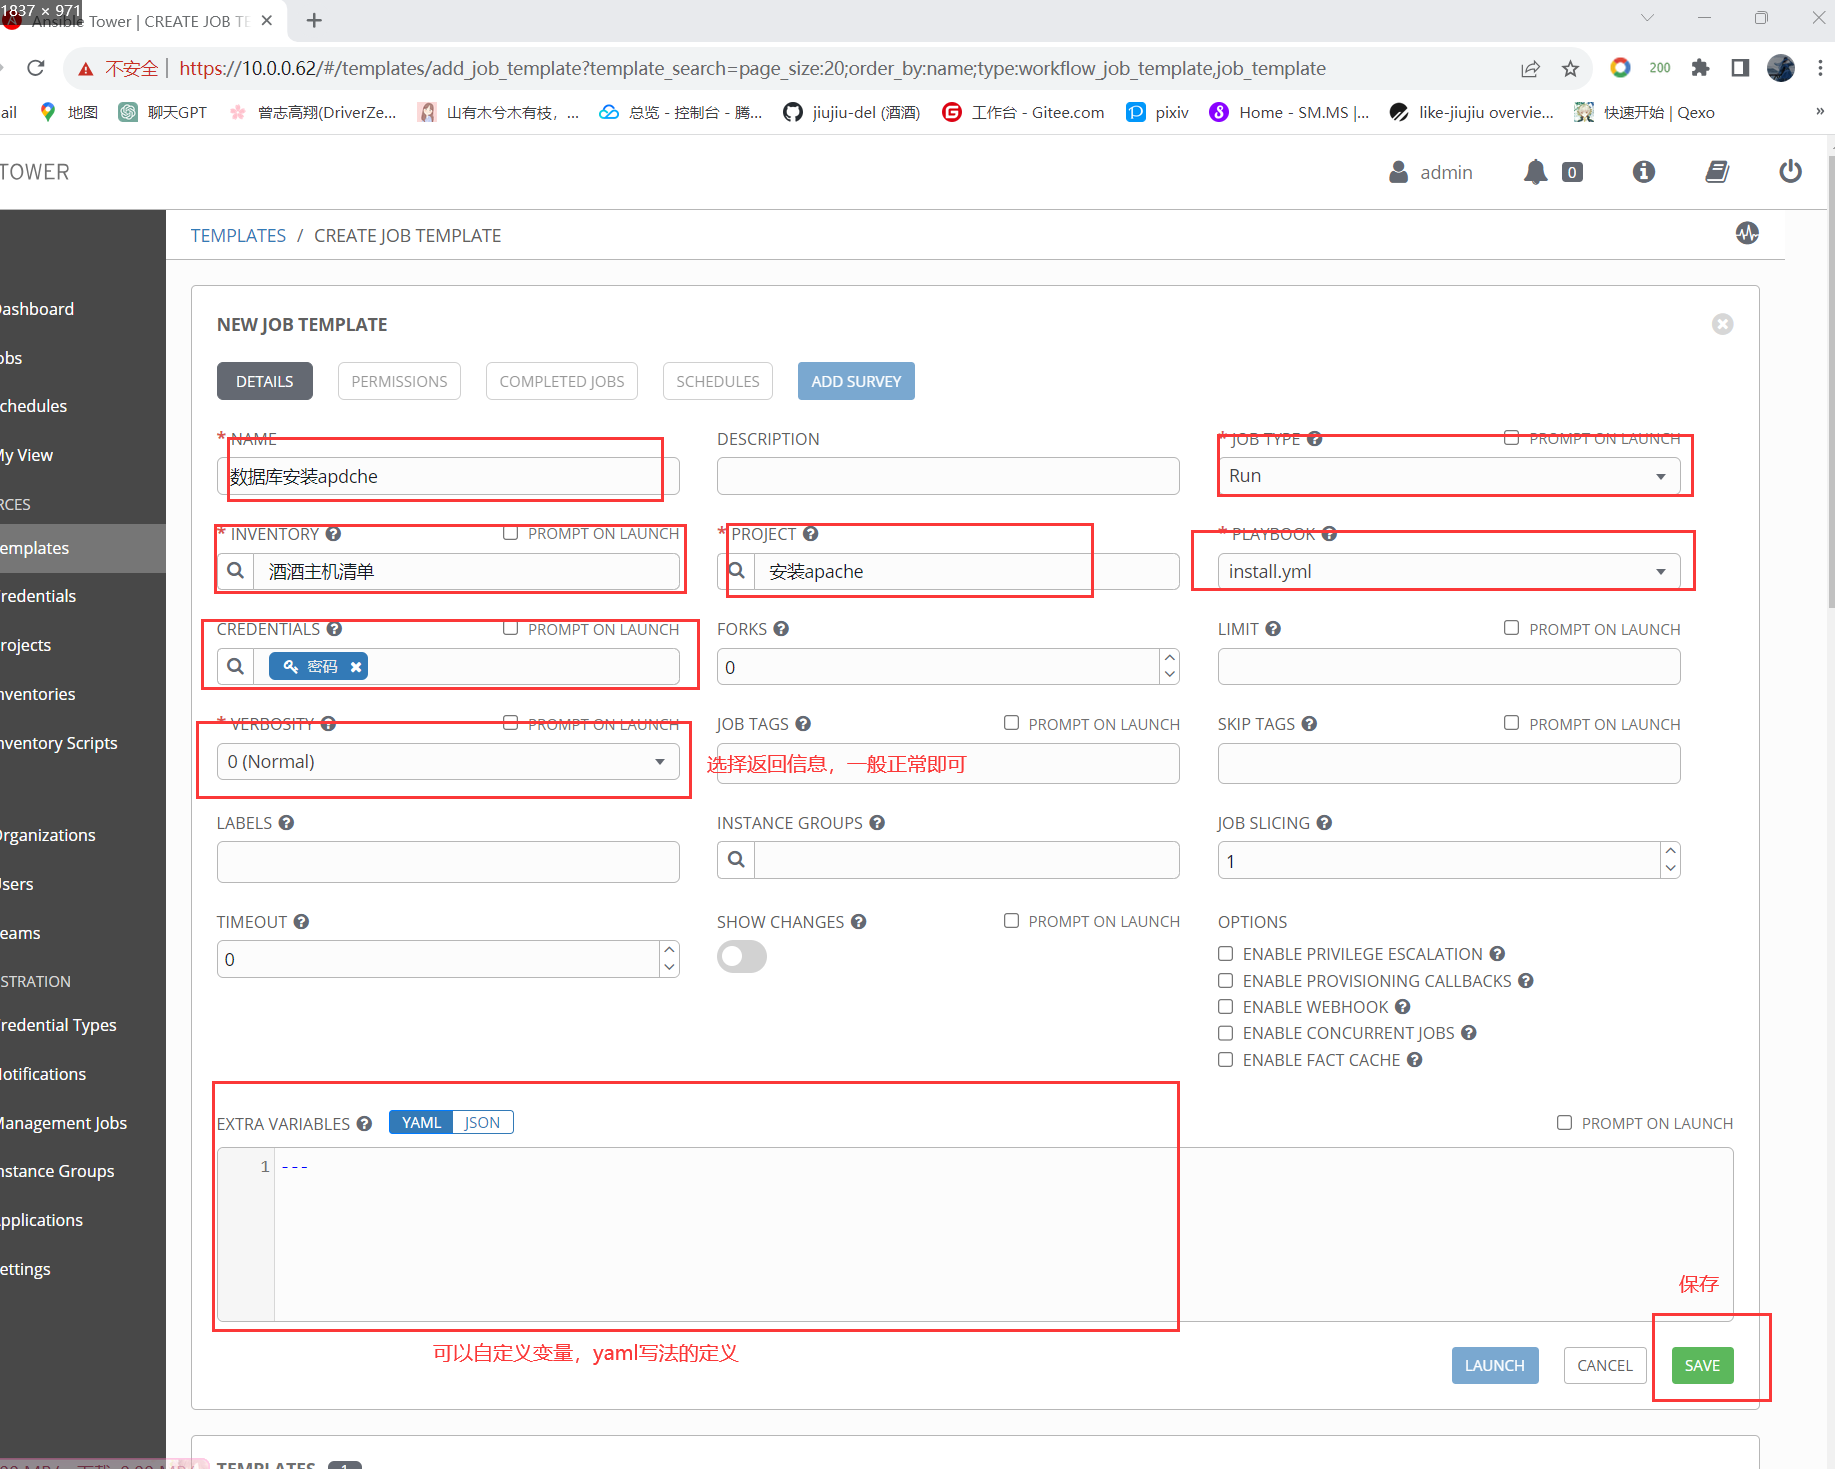
创建任务模板:

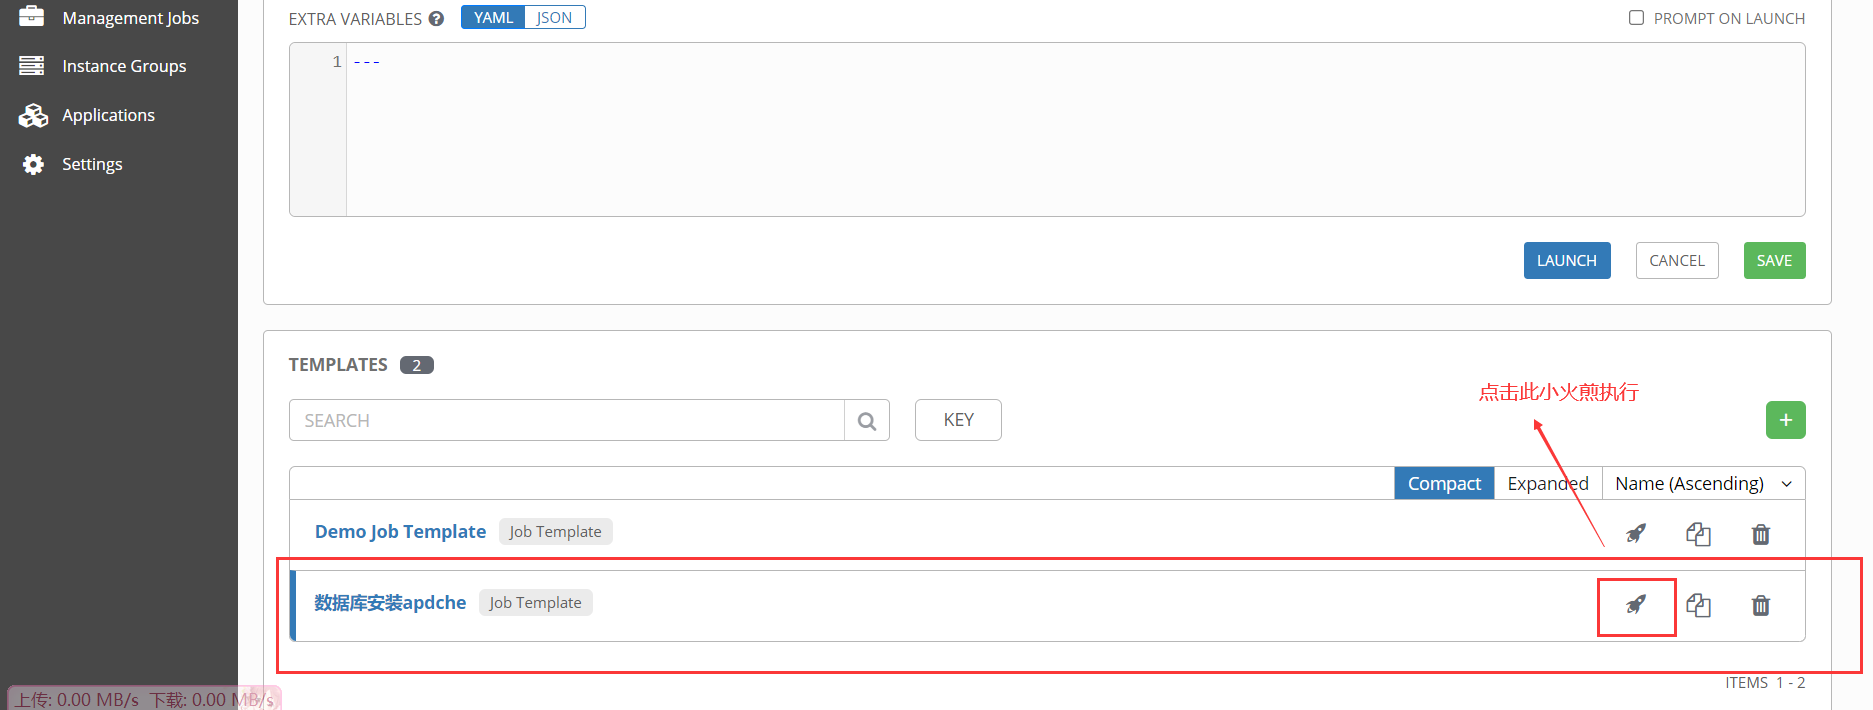
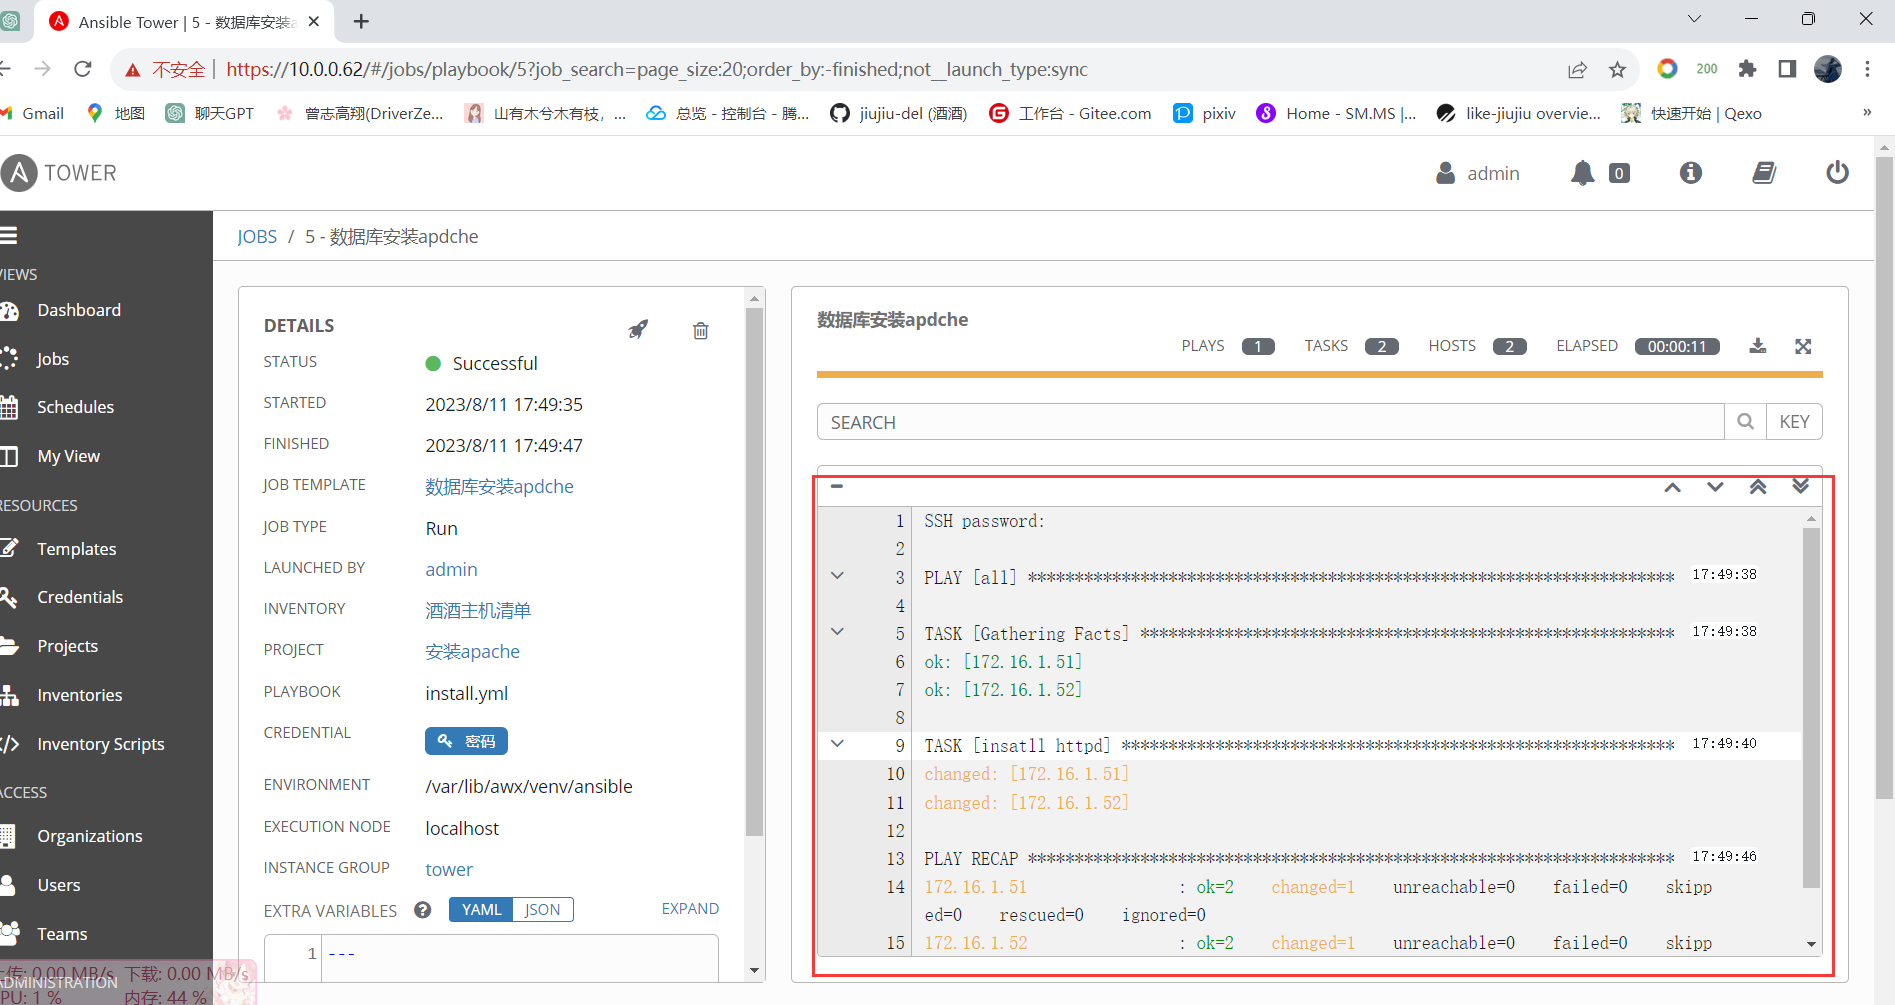
执行任务:
